How to Change Oil in Your Car Without Going to a Mechanic
Changing your own oil is one of the easiest and most rewarding DIY car maintenance tasks you can do at home. With basic tools, the right supplies, and a little confidence, you can complete a full oil change in under 45 minutes. This guide walks you through every step so you can save money and keep your vehicle running strong.
Ever looked under your car and thought, “I could do that myself”? Changing your own oil is one of the simplest ways to take charge of your vehicle maintenance. You do not need a garage full of tools or years of mechanical experience. With a basic oil change kit, a little know-how, and about 45 minutes, you can handle the job right in your driveway.
Knowing how to change oil in car is a skill that pays off fast. It saves you money, teaches you more about your vehicle, and gives you real confidence as a car owner. Whether you drive a sedan, truck, or SUV, the process is remarkably similar across most vehicles. This guide breaks it all down into clear, easy-to-follow steps.
Many people skip oil changes because they dread the cost or the trip to the shop. But the truth is, your engine needs fresh motor oil to stay healthy. Old, dirty oil breaks down and stops lubricating properly. That leads to wear, heat buildup, and eventually expensive repairs. Changing your oil on schedule is one of the best things you can do for your car’s longevity.
Key Takeaways
- Saves Money: Doing it yourself can save $30 to $75 per oil change compared to a shop visit.
- Simple Process: Anyone with basic tools can learn how to change oil in car at home in under an hour.
- Know Your Oil: Always use the correct oil viscosity and amount specified in your owner’s manual.
- Safety First: Use jack stands and never work under a vehicle supported only by a jack.
- Dispose Responsibly: Take used motor oil to a recycling center; never dump it down drains or on the ground.
- Stay on Schedule: Follow your vehicle’s recommended oil change interval to protect engine health.
📑 Table of Contents
- What You Need to Know Before Changing Your Oil
- Step-by-Step Guide to Changing Your Oil
- Common Mistakes to Avoid
- How to Dispose of Used Motor Oil Properly
- When to Seek Professional Help
- How Often Should You Change Your Oil?
- Benefits of Doing Your Own Oil Change
- Quick Tips for a Smooth Oil Change
- Conclusion
What You Need to Know Before Changing Your Oil
Before you grab a wrench, there are a few important things to understand. Skipping this step is where most beginners make mistakes. Taking a few minutes to prepare saves you time and frustration later.
Understanding Your Vehicle’s Oil Requirements
Every car has specific oil needs. The right oil viscosity and amount are critical for engine protection. You can find this information in your owner’s manual. Look for something like “5W-30” or “0W-20” on the oil cap or in the manual.
The viscosity number tells you how thick the oil is at different temperatures. The first number (like the “5” in 5W-30) shows how the oil flows in cold weather. The “W” stands for winter. The second number shows thickness at operating temperature. Using the wrong viscosity can reduce engine performance and cause damage over time.
Also check your oil change interval. Most modern cars need an oil change every 5,000 to 7,500 miles. Older vehicles sometimes require changes every 3,000 miles. If you drive in extreme heat, stop-and-go traffic, or tow heavy loads, you may need to change oil more often.
Gathering Your Tools and Supplies
Having everything ready before you start makes the process smooth and stress-free. Here is a complete checklist of what you need:
- Motor oil — the correct type and amount for your vehicle
- Oil filter — match it to your car’s make, model, and year
- Oil drain pan — big enough to catch all the old oil
- Socket wrench and the right socket size for your drain plug
- Oil filter wrench — helps loosen tight filters
- Jack and jack stands — never rely on a jack alone
- Funnel — makes pouring new oil clean and easy
- Rags and paper towels — for wiping and cleanup
- Gloves — keeps your hands clean and protected
- Torque wrench — ensures the drain plug is tightened correctly
You can buy a pre-packaged oil change kit that includes oil and a filter matched to your vehicle. These kits are available at most auto parts stores and online. They take the guesswork out of choosing the right supplies.
Step-by-Step Guide to Changing Your Oil
Now for the fun part. Follow these steps in order, and you will have fresh oil in your car before you know it. Work on a flat surface and let the engine cool slightly — warm oil drains better, but you do not want to burn yourself.
Lifting Your Vehicle Safely
First, park your car on level ground and engage the parking brake. If you need to access the car undercarriage, you will need to lift the front end. Use a hydraulic jack to raise the vehicle, then place jack stands under the frame. Never put any part of your body under a car supported only by a jack.
Once the car is secure on the jack stands, get underneath and locate the drain plug. It is usually at the bottom of the engine block, on the oil pan. Put your drain pan directly beneath it. This is where all the old oil will flow out.
Draining the Old Oil
Use your socket wrench to loosen the drain plug. Turn it counterclockwise. If it is tight, you can use a breaker bar for extra leverage. Be careful — the oil may still be warm.
Once the plug is loose, remove it by hand and let the old oil drain completely into the pan. This takes about 10 to 15 minutes. While you wait, take a look at the drain plug and the area around it. Check for any metal shavings or signs of damage. A little residue is normal, but heavy metal particles could signal a bigger problem.
After the oil stops flowing, wipe the drain plug clean with a rag. Reinstall it and tighten it by hand first, then use your torque wrench to secure it to the manufacturer’s specification. Over-tightening can strip the threads or crack the oil pan. Under-tightening can cause leaks.
Replacing the Oil Filter
The oil filter catches contaminants and keeps your fresh oil clean. It is usually located near the front or side of the engine. Use your oil filter wrench to loosen the old filter. Turn it counterclockwise.
Old filters can be tight, so be patient. Before you remove it completely, tilt it into the drain pan to let the remaining oil drain out. It will be messy, so keep your rags handy.
Before installing the new filter, dab a little fresh oil on your finger and rub it around the rubber gasket. This creates a better seal and makes future removal easier. Screw the new filter on by hand until the gasket contacts the engine. Then tighten it about three-quarters of a turn. Do not overtighten — you want it snug, not crushed.
Adding Fresh Oil
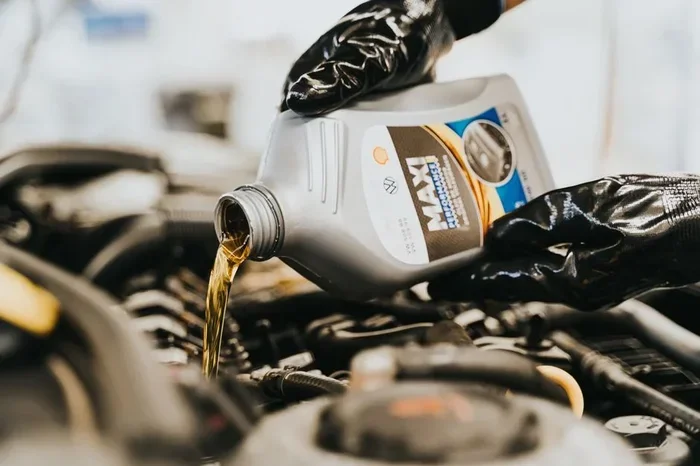
Now it is time to add new oil. Find the oil fill cap on top of the engine. Remove it and place a funnel in the opening. Pour in the fresh motor oil slowly. Add about three-quarters of the recommended amount first.
Wait a minute for the oil to settle, then check the level with your oil dipstick. Wipe the dipstick clean, reinsert it, pull it out again, and read the level. The oil should fall between the minimum and maximum marks.
Add more oil in small amounts if needed. Overfilling can cause pressure problems and leaks. Once the level is correct, replace the fill cap firmly.
Start your engine and let it run for about 30 seconds. This circulates the new oil through the engine and the new filter. Check underneath for any leaks around the drain plug and filter. If everything looks dry, you are done.
Common Mistakes to Avoid
Even simple tasks come with pitfalls. Here are the most common mistakes people make when changing oil at home:
- Using the wrong oil: Always match the viscosity and specification listed in your owner’s manual.
- Forgetting a new oil filter: Reusing an old filter reduces oil quality and engine protection.
- Over-tightening the drain plug: This can strip threads or crack the oil pan, leading to costly repairs.
- Not checking for leaks: Always inspect underneath the car after running the engine.
- Skipping the torque wrench: A torque wrench ensures the drain plug is tight enough without being too tight.
- Ignoring the oil level: Overfilling or underfilling both cause engine problems.
Avoiding these mistakes keeps your vehicle maintenance on track and prevents unnecessary headaches. Take your time, follow each step carefully, and do not rush the process.
How to Dispose of Used Motor Oil Properly
Used motor oil is a hazardous material. It cannot go down the drain, into the trash, or on the ground. One gallon of used oil can contaminate a million gallons of water. That is why proper disposal matters.
Let the old oil cool completely, then pour it from the drain pan into a sealed, leak-proof container. Many auto parts stores, including AutoZone and O’Reilly, accept used oil for recycling. Some local municipalities also have hazardous waste drop-off sites.
Never mix used oil with other fluids like coolant or gasoline. Keep it in a clearly labeled container. Recycling your old oil is an easy way to protect the environment and practice responsible car ownership.
When to Seek Professional Help
Most people can learn how to change oil in car with no problem. But there are situations where a professional is the better choice. If your car has a difficult-to-reach drain plug or oil filter, a mechanic may work faster and safer.
Also, if you notice unusual symptoms after an oil change — strange noises, warning lights, or oil leaks that do not stop — it is time to see an expert. These could signal deeper issues beyond a simple oil change.
If you are uncomfortable working under your car, that is perfectly okay. Many quick-lube shops offer affordable oil changes, and some will even check other fluid levels and tire pressure for free. There is no shame in getting help when you need it.
How Often Should You Change Your Oil?
Your owner’s manual is the best source for your specific interval. However, general guidelines can help you stay on track:
- Conventional oil: Change every 3,000 to 5,000 miles
- Synthetic blend: Change every 5,000 to 7,500 miles
- Full synthetic oil: Change every 7,500 to 10,000 miles
Driving habits affect these numbers too. If you frequently drive in extreme heat, cold, dusty conditions, or short trips under five miles, you may need to change oil more often. These conditions cause moisture and contaminants to build up faster in the oil.
Keep a log of your oil changes. Write down the date, mileage, and oil type used. This makes it easy to track your maintenance schedule and proves helpful if you ever sell the vehicle.
Benefits of Doing Your Own Oil Change
Once you learn the process, you will wonder why you ever paid someone else to do it. Here are the biggest benefits:
- Cost savings: You avoid labor charges, which are often the biggest expense at a shop.
- Convenience: Work on your own schedule, not the shop’s hours.
- Quality control: You choose exactly which oil and filter goes into your engine.
- Knowledge: Understanding your car builds confidence for bigger repairs down the road.
- Speed: A home oil change often takes less time than a trip to the shop.
These benefits add up quickly, especially if you change oil regularly. The more you do it, the faster and easier it becomes.
Quick Tips for a Smooth Oil Change
- Warm up the engine for 2 to 3 minutes before draining — hot oil flows faster.
- Place a cardboard or newspaper under the car to catch drips.
- Take a photo of the old oil filter before removing it — helps with installation.
- Keep a small flashlight handy for seeing under the car.
- Recycle the old oil filter — it still contains usable oil.
- Reset your oil change reminder after completing the service.
Conclusion
Learning how to change oil in car is one of the most valuable skills a car owner can develop. It is straightforward, affordable, and deeply satisfying to complete on your own. With the right supplies, a few basic tools, and this guide, you can handle the job confidently and keep your engine running strong for years to come.
Regular oil changes are the backbone of car maintenance. They protect your engine, improve fuel efficiency, and extend the life of your vehicle. Whether you do it yourself or visit a shop, staying on top of your oil change schedule is one of the best investments you can make.
So grab your oil change kit, find a flat spot in your driveway, and give it a try. Once you complete your first DIY oil change, you will wonder why you ever waited so long to start.
Frequently Asked Questions
What type of oil should I use for my car?
Check your owner’s manual for the recommended oil viscosity and specification. Common options include 5W-30 and 0W-20. Using the correct oil ensures proper engine protection and performance.
How long does it take to change oil at home?
Most people complete a home oil change in 30 to 45 minutes. Once you get comfortable with the process, it can take even less time. Preparation and having all supplies ready helps speed things up.
Can I reuse my old oil filter?
No, you should always install a new oil filter. Old filters are clogged with contaminants and cannot properly clean fresh oil. A new filter protects your engine and extends oil life.
Is it safe to work under my car on a jack?
No, never work under a car supported only by a jack. Always use jack stands rated for your vehicle’s weight. Jacks can slip or fail, causing serious injury.
How do I know if I added too much oil?
Check the oil level on the dipstick after the engine has been off for a few minutes. If the level is above the maximum mark, you have overfilled. Excess oil can cause foaming, pressure buildup, and leaks.
What should I do if I notice a leak after changing my oil?
Turn off the engine and let it cool. Check the drain plug and oil filter for proper tightness. Small drips are common at first, but persistent leaks need attention. Tighten or reseat components as needed, or consult a professional if the leak continues.