How to Replace F150 Front Brakes in 8 Simple Steps
Replacing the front brakes on your Ford F150 is easier than you think. This step-by-step guide walks you through the entire process safely and confidently. You will learn how to swap out brake pads, inspect rotors, and bleed the system like a pro. With basic tools and a little patience, you can complete this how to replace F150 front brakes job in under two hours. Save hundreds on labor and keep your truck stopping strong.
Your Ford F150 is one of the most popular trucks on the road. It handles tough jobs, hauls heavy loads, and takes you wherever you need to go. But all that work depends on one thing — your brakes. When your front brakes start to wear down, it is time to act fast. Many truck owners worry that replacing brakes is complicated or expensive. The truth is, how to replace F150 front brakes is a straightforward job anyone can do at home. You just need the right tools, a little knowledge, and the confidence to get your hands dirty. In this guide, we break the entire process down into 8 simple steps you can follow with ease.
Brake maintenance is one of the most important things you can do for your truck. Worn brake pads reduce stopping power. Bad rotors cause vibrations and unsafe driving conditions. Ignoring brake problems can lead to costly repairs down the road. By learning how to do this job yourself, you take control of your vehicle’s safety and save real money. Whether you are a first-time DIYer or a seasoned gearhead, this guide will give you everything you need. Let us get started and walk through each step together.
Key Takeaways
- You can save hundreds of dollars by replacing your F150 front brakes yourself at home.
- You only need basic tools like a lug wrench, jack stands, and a torque wrench.
- Inspect your rotors every time you change brake pads to prevent uneven wear.
- Brake bleeding is essential for maintaining hydraulic pressure and a firm brake pedal.
- Follow the torque specs to avoid over-tightening or under-tightening critical components.
- Brake pads should be replaced when they are below 3mm in thickness.
- Regular brake maintenance extends the life of your entire braking system.
📑 Table of Contents
- Why Replacing F150 Front Brakes Matters
- Tools and Parts You Will Need
- Step-by-Step Guide to Replace F150 Front Brakes
- How to Bleed the Brake System
- Common Mistakes to Avoid
- How to Know When Your Brakes Need Attention
- Expert Tips for a Perfect Brake Job
- How to Replace F150 Front Brakes: Cost Savings Breakdown
- Frequently Asked Questions
- Conclusion
Why Replacing F150 Front Brakes Matters
Your F150 uses a front disc brake system on both wheels. This setup handles about 70 percent of your truck’s stopping power. That means the front brakes wear out faster than the rear ones. Over time, brake pads thin out from friction. The rotors can warp or develop grooves. Brake fluid can lose pressure over time. All of these issues affect how well your truck stops. Ignoring them is never a good idea.
Replacing your front brakes on schedule keeps you safe on the road. It also protects other parts of the braking system. For example, worn pads can damage rotors beyond repair. Damaged rotors can put extra stress on the calipers. Small problems become big expenses fast. By staying on top of brake maintenance, you avoid those surprises. Plus, a well-maintained braking system gives you peace of mind every time you hit the road.
Tools and Parts You Will Need
Before you start, gather everything you need. Having all your tools ready makes the job go much smoother. You do not want to stop halfway through because you are missing something. Here is what you will need:
Essential Tools
- Lug wrench or impact wrench
- Jack and jack stands for safety
- Socket set (metric sizes for Ford F150)
- Torque wrench for proper tightening
- C-clamp or brake piston tool
- Brake cleaner spray
- Brake fluid (DOT 3 or DOT 4)
- Turkey baster or syringe
- Wire brush for cleaning rust
- Penetrating oil like WD-40
Parts You Will Need
- Front brake pads (ceramic or semi-metallic)
- Brake rotors (if resurfacing or replacing)
- Brake hardware kit (shims, clips, springs)
- Brake fluid (if bleeding the system)
- Brake grease for caliper pins
When shopping for parts, look for a quality brake kit that includes everything you need. Brands like Bosch, Akebono, and Wagner make reliable options. Always check that the parts fit your specific F150 model year. A quick search with your VIN number at the parts store will confirm compatibility.
Step-by-Step Guide to Replace F150 Front Brakes
Now for the part you have been waiting for. Here is exactly how to replace F150 front brakes in 8 simple steps. Take your time and follow each one carefully. Safety comes first, so never skip the jack stand step.
Step 1: Loosen the Lug Nuts
First, park your F150 on a flat, hard surface. Engage the parking brake. Use your lug wrench to loosen the lug nuts on the front wheels. Do not remove them yet — just break the resistance. This is much easier to do while the truck is still on the ground.
Step 2: Lift the Truck and Secure It
Place your jack under the front frame of the F150. Lift the truck until the front wheels are off the ground. Then, slide jack stands under the designated lift points. Lower the truck onto the stands. Never work under a truck supported only by a jack. Jack stands are your best friend for safety.
Step 3: Remove the Wheels
Now fully remove the lug nuts and pull the wheels off. Set them aside in a safe place. You will now see the brake rotor, caliper, and brake pads. Take a moment to look everything over before you start disassembling.
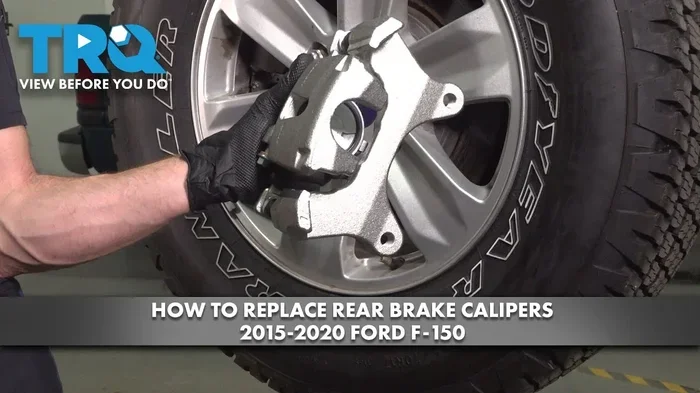
Step 4: Remove the Brake Caliper
Locate the two bolts holding the caliper to the bracket. Use your socket set to remove them. Carefully lift the caliper off the rotor. Do not let it hang by the brake hose — this can damage the line. Use a bungee cord or wire to hang the caliper safely to the suspension.
Step 5: Remove Old Brake Pads and Hardware
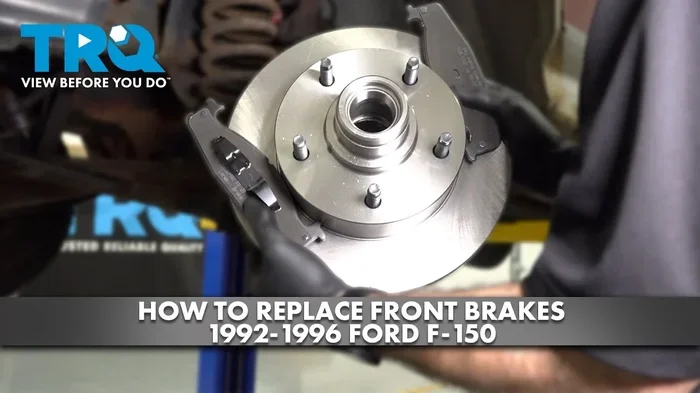
Slide the old brake pads out of the caliper bracket. Remove any clips, shims, or hardware that came with the old pads. Inspect the bracket for rust or debris. Use your wire brush to clean it if needed. Apply a thin layer of brake grease to the contact points. This prevents squeaking and ensures smooth movement.
Step 6: Inspect the Brake Rotors
This is a critical step. Look at the surface of the rotors closely. Run your finger along the edge to check for deep grooves or scoring. Use a micrometer or ask your parts store to check rotor thickness. If the rotors are below the minimum thickness spec or have deep grooves, you need to replace them. Otherwise, you can have them resurfaced at a shop. Rotor resurfacing is a quick and affordable way to restore a smooth braking surface.
Step 7: Install New Brake Pads and Hardware
Insert the new brake pads into the caliper bracket. Make sure the wear indicators are positioned correctly — they should face the rotor. Install the new clips, shims, and hardware from your brake hardware kit. Apply brake grease to the back of the pads where they touch the bracket. This reduces noise and vibration.
Step 8: Compress the Caliper Piston and Reassemble
Use your C-clamp or brake piston tool to push the caliper piston back in. Go slowly and keep the brake fluid reservoir cap loose on the master cylinder. This prevents pressure buildup that could damage the system. Once the piston is seated, place the caliper back over the new pads. Install the caliper bolts and tighten them to the factory torque spec — usually around 25 to 30 foot-pounds for F150 models. Put the wheels back on and hand-tighten the lug nuts. Lower the truck off the jack stands and torque the lug nuts to spec in a star pattern.
How to Bleed the Brake System
After you complete the pad and rotor replacement, you should bleed the brakes. This removes any air that may have entered the system. Air in the lines makes the brake pedal feel spongy or soft. Here is a quick way to do it.
Start with the wheel farthest from the master cylinder. For the F150, that is the passenger-side rear wheel first, then driver-side rear, then passenger-side front, and finally driver-side front. Have a partner pump the brake pedal three times and hold it down. While they hold pressure, open the bleed valve on the caliper with a wrench. Fluid and air will come out. Tighten the valve before your partner releases the pedal. Repeat this process until no air bubbles appear in the fluid. Top off the brake fluid reservoir as needed throughout the process.
Brake bleeding is essential for safe operation. Do not skip this step. A firm brake pedal means your hydraulic pressure is where it should be. If you are uncomfortable with this step, ask a friend to help or watch a video tutorial beforehand.
Common Mistakes to Avoid
Even experienced DIYers make mistakes when replacing brakes. Here are the most common errors and how to avoid them:
- Forgetting to replace brake fluid. Old fluid absorbs moisture and reduces braking performance. Flush it if it has not been changed in two years.
- Over-tightening caliper bolts. This can strip the threads or crack the bracket. Always use a torque wrench.
- Reusing old hardware. Spring clips and shims wear out. Reusing them causes noise and uneven pad wear.
- Not cleaning the caliper slides. Dirty slides cause the caliper to stick, leading to uneven pad wear and overheating.
- Skipping the test drive. Always test your brakes in a safe, empty area before driving in traffic. Pump the pedal a few times to seat the pads.
- Ignoring brake dust buildup. Clean the wheels and brake components regularly. Excessive dust can indicate pad material issues.
Avoiding these mistakes will save you time, money, and frustration. It will also keep your Ford F150 braking system working at its best for years to come.
How to Know When Your Brakes Need Attention
You do not have to wait for a brake job to notice warning signs. Your truck gives you clues when something is wrong. Pay attention to these signals:
- Squealing or grinding noises when you apply the brakes. This usually means the pad material is worn down to the metal wear indicators.
- A spongy or soft brake pedal. This can indicate air in the lines or low brake fluid.
- Vibrations through the steering wheel when braking. This often points to warped rotors.
- The truck pulls to one side when you brake. This may mean a stuck caliper or uneven pad wear.
- Longer stopping distances. If your truck takes more time to stop than usual, do not ignore it.
- Brake warning light on the dashboard. This could signal low fluid or a sensor issue.
catching these signs early can prevent more serious damage. Regular brake service keeps your F150 in top shape and protects everyone on the road.
Expert Tips for a Perfect Brake Job
Here are some pro tips that make a real difference in the quality of your work:
- Take photos before you disassemble. This helps you remember how everything fits together when it is time to reassemble.
- Clean everything with brake cleaner. Dirt and grease on brake components cause noise and uneven wear. Spray and wipe down all mating surfaces.
- Check the brake hose for cracks. Old rubber hoses can swell and restrict fluid flow. Replace them if you see any damage.
- Use anti-seize on lug nut threads. This prevents the nuts from seizing onto the studs over time.
- Bed in your new pads properly. After installation, do several moderate stops from 40 to 50 mph to evenly transfer pad material to the rotor surface.
- Keep a brake fluid catch bottle. When bleeding brakes, fluid spills can damage paint. Have a container ready to catch drips.
These small tips add up to a professional-quality brake job. Your F150 will feel like new, and you will have the confidence that comes from doing the work yourself.
How to Replace F150 Front Brakes: Cost Savings Breakdown
One of the biggest reasons people learn how to replace F150 front brakes at home is the cost savings. A professional brake service at a shop typically costs between 300 and 600 dollars for front brakes on an F150. That includes parts and labor. When you do it yourself, you only pay for the parts.
A quality front brake kit with pads and rotors usually runs between 80 and 150 dollars. Add a brake hardware kit for about 15 to 25 dollars, and you are looking at roughly 100 to 175 dollars total. That is a savings of 200 to 400 dollars or more. Over time, doing your own brake maintenance adds up to serious money saved.
Plus, you learn valuable skills that apply to other vehicle repairs. Every job you do yourself builds your confidence and mechanical knowledge. It is a win-win for your wallet and your skill set.
Frequently Asked Questions
How often should I replace my F150 front brake pads?
Most F150 front brake pads last between 30,000 and 70,000 miles depending on driving habits. Heavy towing, stop-and-go traffic, and aggressive driving wear pads faster. Check your pad thickness every 10,000 miles during routine maintenance. When the pads reach 3mm or less, it is time for replacement.
Can I reuse my old brake rotors?
Yes, you can reuse rotors if they are above the minimum thickness specification and have no deep grooves or warping. A mechanic can measure rotor thickness with a micrometer. If the rotors are within spec, they can also be resurfaced at a shop for a smoother surface. However, replacing them with new rotors ensures the best braking performance and longevity.
What type of brake pads are best for the F150?
Ceramic pads are the most popular choice for daily driving. They produce less dust, run quieter, and are gentler on rotors. Semi-metallic pads offer better stopping power and heat dissipation, making them ideal for towing or heavy loads. Choose based on your driving needs and preferences.
Do I need to bleed the brakes after replacing pads?
You do not always need to bleed the brakes when only replacing pads. However, if you pushed the caliper piston back far enough to open the brake line, or if the pedal feels spongy after the job, bleeding is necessary. Bleeding ensures there is no air in the hydraulic system for a firm, responsive brake pedal.
How long does it take to replace F150 front brakes?
Most DIYers complete the entire front brake replacement in 1 to 2 hours. Experienced mechanics can do it in under an hour. Your first time may take a bit longer as you get familiar with the process. Having all tools and parts ready beforehand helps keep the job moving smoothly.
What causes premature brake wear on the F150?
Several factors cause front brakes to wear out faster than expected. Towing heavy loads puts extra stress on the braking system. Driving in hilly or mountainous terrain increases brake usage. Aggressive driving with hard braking generates more heat and friction. Worn suspension components can also cause uneven pad wear by allowing the caliper to float improperly.
Conclusion
Replacing the front brakes on your Ford F150 is one of the most rewarding DIY jobs you can tackle. It saves you money, builds your mechanical skills, and keeps your truck safe on the road. By following these 8 steps, you can confidently handle how to replace F150 front brakes without any professional help. Remember to gather your tools, inspect every component, and take your time with each step. Brake maintenance is not just about swapping out parts — it is about protecting yourself and everyone else on the road. Your F150 works hard for you. Give it the care it deserves with regular brake service. Now grab your tools and get to work. Your truck will thank you with every stop.