What Direction Do I Go To Take Off a Tire the Easy Way
If you’ve ever wondered what direction do i go to take off a tire, you’re not alone. The answer is simpler than you think: you turn the lug nuts counterclockwise to loosen them. This guide will walk you through the entire process, from the right tools to common mistakes, so you can get the job done fast and safely.
Key Takeaways
- Turn counterclockwise: Lug nuts loosen by turning left, not right.
- Use the right tools: A tire iron, breaker bar, and jack stand make the job safe.
- Never skip the jack stand: Working under a car on just a jack is dangerous.
- Apply Tire Armor after removal: Protect the rubber from dry rot and UV damage.
- Tighten in a star pattern: This ensures even pressure and prevents warping.
- Practice on a flat surface: Always work on level ground for stability.
📑 Table of Contents
Why Direction Matters When Removing a Tire
Every driver faces a flat tire at some point. You pull over, grab your tools, and then the question hits you: what direction do i go to take off a tire? It seems like a small detail, but getting the direction wrong can strip the lug nuts or waste precious time. The good news is that the rule is simple and universal for most passenger vehicles. Once you know the basic motion, you’ll never second-guess yourself again.
Tire removal isn’t just about muscle. It’s about technique. The lug nuts are designed to stay tight while you drive, so they use a right-hand thread. That means turning them counterclockwise to loosen. This design keeps the nuts tight as the wheel spins forward. Understanding this one fact makes tire removal feel much less intimidating.
The Physics of Lug Nuts
Think of a bolt on a spinning wheel. When you drive forward, the wheel rotates clockwise (for the right side). That rotation tightens the lug nut. To reverse that, you must turn it the opposite way. This is why what direction do i go to take off a tire almost always means turning left. The thread is a right-hand thread, which is the standard in the automotive world.
Some older vehicles or specialty equipment might use left-hand threads on one side. But for 99% of cars, trucks, and SUVs, counterclockwise loosens. If you’re unsure, remember this simple phrase: “Lefty loosey, righty tighty.” It works for lug nuts every time.
Why Most People Get It Wrong
Many people assume they should turn right because that’s how they open tight jar lids. But jar lids don’t have a spinning wheel attached to them. The momentum of the vehicle works against you if you try to loosen by turning right. You’ll just tighten the nut further. This mistake is common, especially for new drivers. Taking a moment to think about the direction saves you from a frustrating stuck lug nut.
What Direction Do I Go To Take Off a Tire the Easy Way
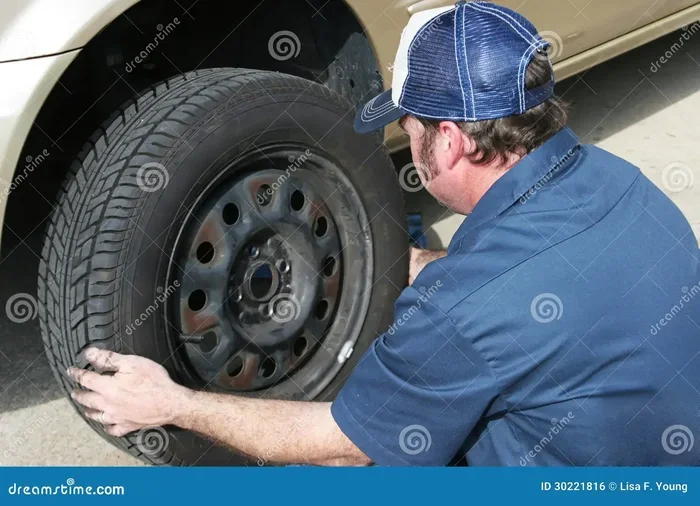
The easy way to answer what direction do i go to take off a tire is: counterclockwise. You turn the lug nut to the left. Use your tire iron or breaker bar and push down on the handle. Gravity helps you apply steady force. If the nut is really tight, you can stand on the wrench for extra leverage. Always push downward, not upward, to avoid injury.
Here is a quick reference table to clear up any confusion:
| Action | Direction | Mnemonic |
|---|---|---|
| Loosen lug nuts | Counterclockwise (left) | Lefty loosey |
| Tighten lug nuts | Clockwise (right) | Righty tighty |
| Exceptions | Rare left-hand threads | Check your owner manual |
Once you break the initial resistance, the nut will spin freely. You’ll feel a sudden give, which tells you the tire removal process is working. Keep the wrench steady and don’t rush. Steady pressure beats brute force every time.
The Simple Rule: Counterclockwise
For all standard wheels, the rule is the same. Place the tire iron on the lug nut. Push the handle to the left. The nut will begin to turn. If it doesn’t budge, do not force it. Spray a little penetrating oil around the base and wait a few minutes. Then try again. The direction never changes, but patience does the job.
Exceptions for Special Vehicles
A few vehicles use left-hand threads on the left side and right-hand threads on the right side. This prevents the nuts from loosening during driving. If you drive an older Audi, BMW, or some trucks, check your owner’s manual. The manual will confirm the thread direction. In most cases, you’ll still turn counterclockwise to loosen, but the threading is different. When in doubt, look for a small arrow on the wheel that shows the loosen direction.
Tools You Need for Tire Removal
Having the right tools makes tire removal a breeze. You don’t need a garage full of equipment. A few essentials will get the job done safely and quickly.
Essential Tools
- Tire iron or lug wrench: This is the bar that fits over the lug nut. A cross wrench gives you better leverage.
- Car jack: A scissor jack or hydraulic jack lifts the vehicle off the ground.
- Jack stand: This is a must-have. It holds the car securely while you work underneath.
- Breaker bar: A long handle that adds torque to break stubborn lug nuts loose.
- Torque wrench: Used to tighten the lug nuts to the correct specification after reinstallation.
Optional but Helpful
- Penetrating oil: WD-40 or PB Blaster helps free rusted or over-tightened nuts.
- Gloves: Protect your hands from grease and sharp edges.
- Wheel chocks: Wedge these behind the tires to prevent the car from rolling.
- Tire pressure gauge: Check the spare tire pressure before you need it.
Before you start, gather everything. Fumbling for a tool while the car is lifted is risky. Lay out your tire iron, breaker bar, and jack stand in a neat row. This small prep step saves time and frustration.
Step-by-Step Tire Removal Guide
Follow these steps to remove a tire safely. Each step builds on the last, so don’t skip ahead.
Step 1: Park on a Flat Surface
Find a level parking spot away from traffic. Turn off the engine and engage the parking brake. Place wheel chocks behind the rear tires if you’re working on the front. This prevents the car from rolling while you lift it.
Step 2: Loosen the Lug Nuts
Before you jack up the car, loosen the lug nuts while the tire is still on the ground. This keeps the wheel from spinning. Use your tire iron to turn each nut counterclockwise. You don’t need to remove them fully—just break the resistance. Work in a star pattern to keep pressure even. This is the most important part of what direction do i go to take off a tire.
Step 3: Lift the Vehicle
Place the jack under the vehicle’s designated lift point. Raise the car until the tire is a few inches off the ground. Then, set the jack stand under a sturdy part of the frame. Lower the car gently onto the jack stand. Never rely on the jack alone. The jack stand provides a stable, secure hold.
Step 4: Remove the Lug Nuts and Tire
Now fully unscrew each lug nut by turning counterclockwise. Keep them in a safe spot, like a cup or your pocket. Pull the tire straight toward you. It may be heavy, so lift with your legs. Set the tire flat on the ground, out of the way. If you’re replacing the tire with a spare, you’ll need to clean the hub and check the valve stem before mounting.
Step 5: Clean and Inspect
Take a moment to inspect the wheel rim and brake rotor. Look for rust, cracks, or excessive wear. Use a wire brush to clean any rust from the hub surface. This ensures a flush fit when you reinstall the tire. If the tire is being stored, now is the perfect time to apply a protective coating.
Common Mistakes to Avoid
Even experienced drivers make errors during tire removal. Avoiding these pitfalls keeps you safe and prevents damage.
Rushing the Process
Don’t force a stuck lug nut. Forcing it can round the edges, making removal nearly impossible. Apply penetrating oil and let it sit. Use a breaker bar for extra leverage. Patience is the secret to easy tire removal.
Skipping the Jack Stand
A jack can slip or fail. Thousands of injuries happen each year from cars falling off jacks. Always use a jack stand. It’s a small step that makes a huge difference in safety. Never put any part of your body under the vehicle supported only by a jack.
Forgetting to Protect the Tire
Once the tire is off, the rubber is exposed to the elements. UV rays and ozone cause dry rot. If you’re storing the tire, consider applying a sealant. A product like Tire Armor creates a barrier that shields the rubber from cracking and fading. Skipping this step means your stored tire might degrade before you need it again.
After Removal: Protecting Your Tire
Removing the tire is only half the job. How you care for it afterward determines how long it lasts. Whether you’re storing a spare or swapping to seasonal wheels, protection matters.
Apply Tire Armor for Long-Lasting Protection
Tire Armor is a spray-on coating that seals the rubber surface. It blocks moisture, UV light, and road grime. After cleaning the tire, spray a light, even coat over the sidewall and tread. Let it dry for a few minutes. The tire will look fresh and stay flexible for months. Tire Armor is an affordable way to extend the life of your rubber, especially if you keep a spare in the trunk.
Storing the Tire Properly
Store tires in a cool, dry place away from direct sunlight. Ozone from electric motors can also cause cracks, so keep them away from generators or furnaces. If you’re hanging the tire, use a tire hook through the valve stem. Stacking tires flat is fine for short-term storage, but hanging prevents flat spots from forming.
Reinstalling the Tire
When putting the tire back on, hand-tighten the lug nuts first. Lower the car until the tire touches the ground but doesn’t bear full weight. Then tighten the nuts in a star pattern with a torque wrench. This ensures even clamping force and prevents the wheel from wobbling. Finally, lower the car completely and give each nut a final check.
Knowing what direction do i go to take off a tire is a skill that saves time and money. With the right tools, the correct direction, and a little patience, anyone can handle a tire change. Remember to protect your investment with a quality coating like Tire Armor, and always prioritize safety by using a jack stand. Practice these steps once, and you’ll be confident the next time a flat tire strikes.
Frequently Asked Questions
Which way do you turn lug nuts to remove a tire?
You turn lug nuts counterclockwise to loosen them. The standard rule is “lefty loosey.” This direction works for almost all passenger vehicles because the thread is a right-hand thread. If the nut is stuck, use a breaker bar and penetrating oil for extra leverage.
Do I need a jack stand if I have a hydraulic jack?
Yes, absolutely. A jack stand provides a secure, stable hold that a hydraulic jack cannot match. Jacks can slip or fail, which is extremely dangerous. Always lower the vehicle onto a jack stand before you go underneath it. Never rely on a jack alone for support.
Can I use a regular wrench instead of a tire iron?
You can, but a tire iron or cross wrench gives you much better leverage. Lug nuts are tightened to high torque, so a short wrench might not provide enough force. A breaker bar attached to your tire iron makes removing tight lug nuts much easier and safer.
How do I know if my tire is a spare or a full-size tire?
Check the tire sidewall for markings. A spare tire often says “TEMPORARY USE ONLY” or has a smaller size like “T125/80R16.” Full-size spares match the other four tires on your vehicle. Always check your tire pressure on the spare before you need it.
What should I do if a lug nut is stripped or stuck?
First, apply a penetrating oil like WD-40 and let it soak for 15 minutes. Then try a breaker bar with a cheater pipe for extra length. If it still won’t budge, you may need to drill it out or take the vehicle to a mechanic. Never force a stripped nut with excessive pressure, as it can damage the wheel rim.
How often should I apply Tire Armor to my tires?
Apply Tire Armor every 3 to 6 months for tires that are exposed to the elements. For stored tires, a single coat before storage provides excellent protection. Reapply if you notice the rubber looking dry or faded. A light coat is all you need—don’t over-spray.