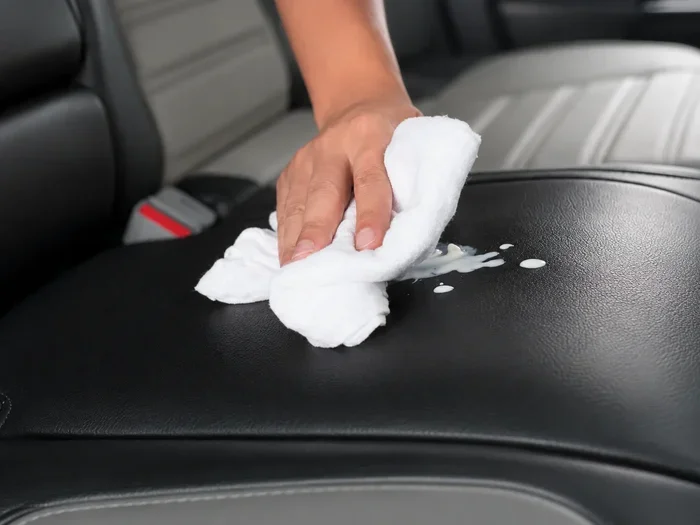
Best Ways to Clean Leather Car Seats
Learn the best ways to clean leather car seats using simple, affordable methods. This guide covers everything from basic cleaning supplies to removing tough stains and keeping your leather seats looking great for years. You will find step-by-step instructions, expert tips, and common mistakes to avoid. Whether you drive a sedan or an SUV, these tips work for all leather interiors.
Your leather car seats are one of the first things people notice when they get inside your vehicle. Over time, dirt, spills, and daily wear can dull the shine and cause cracks. If you want to keep your interior looking premium, you need to know the best ways to clean leather car seats. Fortunately, you do not need expensive professional services to get great results. With the right supplies and a little time, you can restore your seats to their original glory.
Cleaning leather seats is different from cleaning fabric seats. Leather is a natural material that needs gentle care. Harsh chemicals can dry it out, cause fading, and even lead to cracking. This guide walks you through every step of the process. You will learn what supplies to use, how to tackle stubborn stains, and how to protect your seats long-term. Let us dive in and help you get those seats looking amazing.
Key Takeaways
- Regular cleaning prevents buildup: Wipe your seats weekly with a damp microfiber cloth to keep leather looking new.
- Use the right cleaner: Always choose a pH-balanced leather cleaner to avoid drying or cracking your seats.
- Condition after cleaning: Conditioning restores moisture and protects against UV damage and fading.
- Treat stains quickly: The faster you address spills and stains, the easier they are to remove.
- Avoid harsh chemicals: Household cleaners can strip leather’s natural oils and cause permanent damage.
- Protect your investment: Using a leather protectant spray adds a barrier against dirt and wear.
📑 Table of Contents
- Why Leather Car Seats Need Special Care
- Supplies You Will Need for Cleaning Leather Seats
- Step-by-Step Process to Clean Leather Car Seats
- Removing Common Stains from Leather Seats
- How to Condition and Protect Leather Seats
- Common Mistakes to Avoid When Cleaning Leather Seats
- Expert Tips for Keeping Leather Seats Looking New
- Comparison: DIY vs. Professional Leather Cleaning
- How Often Should You Clean Leather Car Seats?
- Conclusion
Why Leather Car Seats Need Special Care
Leather is a beautiful material, but it is also sensitive. Unlike cloth seats, leather can dry out when exposed to sunlight or extreme temperatures. It also absorbs oils and dirt quickly, which makes regular leather seat maintenance essential. When you neglect cleaning, grime builds up and becomes much harder to remove.
Here is why special care matters:
- Leather is porous: It absorbs liquids and oils faster than other materials.
- UV damage is real: Sunlight fades the color and dries out the surface.
- Cracking happens over time: Dry leather loses flexibility and starts to crack.
- Stains set in quickly: Spills that sit for hours become permanent marks.
- It affects resale value: Well-maintained leather seats boost your car’s overall value.
When you follow the best ways to clean leather car seats, you protect both the look and the longevity of your interior. A little effort each week saves you from costly repairs or full seat replacements later on.
Supplies You Will Need for Cleaning Leather Seats
Before you start cleaning, gather everything you need. Having the right supplies makes the process faster and more effective. You do not need a lot of products, but choosing the right ones matters.
Essential Cleaning Supplies
- pH-balanced leather cleaner: This is the most important product. It cleans without stripping natural oils.
- Microfiber cloths: Use soft, lint-free cloths to avoid scratching the leather surface.
- Soft-bristle brush: A gentle brush helps lift dirt from seams and crevices.
- Distilled water: Tap water contains minerals that can leave spots on leather.
- Leather conditioner: This restores moisture after cleaning and prevents drying.
- Leather protectant spray: A spray adds a protective layer against future stains.
- Baking soda: Great for absorbing odors and lifting light stains naturally.
- White vinegar solution: A mild mix helps tackle grease and light discoloration.
Avoid using household cleaners like dish soap or all-purpose sprays. These products are too harsh for leather and can cause long-term damage. Stick to products designed specifically for automotive leather upholstery care.
Step-by-Step Process to Clean Leather Car Seats
Now that you have your supplies, let us walk through the cleaning process. Follow these steps carefully for the best results. This method works for all types of leather seats, whether in a compact car or a full-size truck.
Step 1: Vacuum the Seats
Start by removing loose dirt and debris. Use a handheld vacuum or your car’s built-in vacuum attachment. Pay attention to the seams, creases, and between seat cushions. Dirt trapped in these areas can scratch the leather during cleaning.
Step 2: Test Your Cleaner
Before applying any cleaner to the entire seat, test it on a small hidden area. Wait a few minutes and check for discoloration or damage. This step is often skipped, but it saves you from costly mistakes. If the cleaner looks safe, you can proceed with confidence.
Step 3: Apply the Leather Cleaner
Spray a small amount of leather cleaner onto a microfiber cloth. Do not spray directly onto the seat, as excess moisture can seep into the padding. Gently wipe the entire surface in circular motions. Work on one section at a time for thorough coverage.
Step 4: Scrub the Seams and Creases
Use your soft-bristle brush to clean the seams and creases where dirt accumulates. Apply light pressure and brush in gentle circles. These areas often hold the most grime, so give them extra attention.
Step 5: Wipe Away Residue
After cleaning, use a clean, damp microfiber cloth to wipe away any residue. Go over each section until no cleaner remains. Make sure the cloth is only slightly damp, not soaking wet.
Step 6: Dry the Seats Completely
Let the seats air dry for at least 30 minutes. Do not use a hairdryer or direct heat, as this can cause the leather to crack. Once dry, move on to conditioning for the best results.
Removing Common Stains from Leather Seats
Even with regular care, stains happen. Coffee spills, food marks, and ink spots are common problems. The key is to act fast and use the right technique. Here are the best ways to clean leather car seats when dealing with specific stains.
Water Stains and Rain Spots
Water spots appear when moisture evaporates and leaves mineral deposits behind. To remove them, mix equal parts distilled water and white vinegar. Dip a microfiber cloth into the solution and gently rub the affected area. Wipe clean with a damp cloth and let it dry naturally.
Food and Drink Stains
For coffee, juice, or food spills, blot the area immediately with a dry cloth. Then apply a small amount of leather cleaner and wipe gently. For older stains, make a paste with baking soda and water. Apply it to the stain, let it sit for 10 minutes, and wipe it away with a damp cloth.
Grease and Oil Stains
Grease is one of the trickiest stains on leather. Sprinkle baking soda directly onto the stain and let it sit for 15 to 20 minutes. The baking soda absorbs the oil. Brush it off gently and wipe the area with a leather cleaner. Repeat if necessary.
Ink Marks
Ink stains require extra care. Use a leather-specific ink remover or a small amount of rubbing alcohol on a cloth. Test on a hidden area first, then dab the stain gently. Do not rub, as this can spread the ink. Wipe clean and condition the area afterward.
Mold and Mildew
If you notice mold or mildew on your seats, act quickly. Mix a solution of one part water and one part rubbing alcohol. Wipe the affected area and let it dry in the sun if possible. Mold can damage leather permanently if left untreated, so do not ignore early signs.
How to Condition and Protect Leather Seats
Cleaning is only half the battle. Conditioning is what keeps your leather soft, supple, and protected. After every deep clean, you should apply a quality leather conditioner. This step restores moisture lost during cleaning and creates a barrier against future damage.
Here is how to condition your seats properly:
- Make sure the seats are completely dry before applying conditioner.
- Apply a thin layer of conditioner using a microfiber cloth.
- Work in small circles to help the product absorb evenly.
- Let it sit for 10 to 15 minutes so the leather absorbs the moisture.
- Buff off any excess with a clean, dry cloth.
For ongoing protection, apply a leather protectant spray every two to four weeks. This spray creates an invisible barrier that repels water, dirt, and UV rays. It is one of the simplest things you can do to extend the life of your leather seats.
When choosing a conditioner, look for products with natural ingredients like lanolin or beeswax. Avoid conditioners that contain petroleum-based chemicals, as these can clog the leather pores and cause long-term damage. Brands that specialize in automotive leather seat restoration products are often the safest bet.
Common Mistakes to Avoid When Cleaning Leather Seats
Even with the best intentions, people make mistakes that damage their leather seats. Here are the most common errors to avoid:
Using the Wrong Cleaner
Many people reach for household cleaners out of convenience. Products like all-purpose spray, bleach, or ammonia are too harsh for leather. They strip away the natural oils and cause the leather to dry out and crack. Always use a cleaner designed for automotive leather.
Skipping the Conditioning Step
Cleaning without conditioning leaves the leather vulnerable. The cleaning process removes dirt but also removes some natural moisture. Skipping conditioner leads to dry, stiff seats that crack faster. Always condition after every deep cleaning session.
Using Too Much Water
Over-saturating leather is a common mistake. Excess water seeps into the padding and backing, which can cause mold and unpleasant odors. Use a damp cloth, not a wet one, and never soak the seats.
Ignoring Small Stains
Small stains seem harmless, but they grow over time. Dirt and oils spread, making the stain larger and harder to remove. Address spills and marks as soon as you notice them for the easiest cleanup.
Using Heat to Dry Leather
It is tempting to speed up drying with a hairdryer or by parking in direct sunlight. Both of these practices damage leather. Heat causes the material to shrink and crack. Always let your seats dry naturally at room temperature.
Neglecting Regular Maintenance
Deep cleaning once a year is not enough. Without regular upkeep, dirt accumulates and becomes embedded in the leather. Wipe down your seats weekly and condition them monthly for the best long-term results.
Expert Tips for Keeping Leather Seats Looking New
Professional detailers share a few secrets that make a huge difference. Here are some expert-backed tips to keep your leather seats in top shape:
- Park in the shade whenever possible. Sun exposure is the number one cause of leather fading and cracking.
- Use a sunshade on your windshield. This keeps the interior cooler and protects the leather from UV rays.
- Wipe down seats after every road trip. A quick wipe prevents dirt from settling into the leather.
- Condition your seats every 30 days. Regular conditioning keeps the leather supple and resistant to stains.
- Invest in seat covers for pets. If you travel with pets, covers protect your seats from scratches and hair.
- Keep a stain removal kit in your trunk. A small kit with leather cleaner and cloths helps you handle spills on the go.
Following these tips alongside the best ways to clean leather car seats ensures your interior stays looking factory-fresh for years. Consistency is the key to great results.
Comparison: DIY vs. Professional Leather Cleaning
Many car owners wonder whether they should clean their leather seats themselves or hire a professional. Both options have their advantages. Here is a quick comparison to help you decide:
| Factor | DIY Cleaning | Professional Cleaning |
|---|---|---|
| Cost | Low ($10-$30 for supplies) | High ($100-$300 per session) |
| Convenience | Do it anytime at home | Requires scheduling and drop-off |
| Results | Good with proper technique | Excellent for deep stains |
| Time | 30-60 minutes | 2-4 hours (drop-off and pick-up) |
| Customization | Full control over products used | Limited to their product options |
| Frequency | Can clean as often as needed | Best for occasional deep cleans |
For most car owners, a combination of both works best. Clean and condition your seats yourself on a regular basis, and visit a professional once or twice a year for a deep leather seat restoration. This approach keeps your seats in excellent condition without breaking the bank.
How Often Should You Clean Leather Car Seats?
The frequency of cleaning depends on how you use your car. If you drive daily and have kids or pets, you should clean your seats more often. Here is a simple schedule to follow:
- Weekly: Wipe down seats with a damp microfiber cloth to remove surface dirt.
- Monthly: Apply a leather conditioner to keep the material moisturized.
- Every 3 Months: Perform a full deep clean using a leather cleaner and soft brush.
- Twice a Year: Consider a professional detailing session for a thorough refresh.
Sticking to this schedule is one of the easiest best ways to clean leather car seats and maintain them long-term. Prevention always beats restoration when it comes to leather care.
Conclusion
Taking care of your leather car seats does not have to be complicated. With the right supplies, a little know-how, and consistent effort, you can keep your seats looking brand new. The best ways to clean leather car seats involve gentle cleaners, regular conditioning, and quick stain treatment. Avoid common mistakes like using harsh chemicals or skipping the conditioning step.
Remember, leather is a natural material that thrives with proper care. When you invest a small amount of time each week, you protect your investment and enjoy a premium interior every time you drive. Start with the supplies listed in this guide, follow the step-by-step process, and make leather care a regular part of your car maintenance routine. Your seats will thank you for it.
Now that you know the best ways to clean leather car seats, there is no reason to wait. Grab your supplies, set aside 30 minutes this weekend, and give your seats the care they deserve. Your car’s interior will look and feel amazing when you are done.
Frequently Asked Questions
What is the best cleaner for leather car seats?
A pH-balanced leather cleaner specifically designed for automotive use is the best choice. Look for products free from harsh chemicals like ammonia or bleach. Brands that specialize in leather car seat cleaner formulations are the safest and most effective options for your seats.
Can I use household products to clean leather seats?
It is not recommended. Household cleaners like dish soap, all-purpose spray, or bleach can strip leather of its natural oils and cause cracking. Stick to products made specifically for automotive leather care to avoid long-term damage.
How often should I condition my leather car seats?
You should condition your leather seats every 30 days or at least once a month. Conditioning restores moisture and creates a protective barrier against dirt, UV rays, and everyday wear. In hot climates or with frequent sun exposure, conditioning every two weeks is ideal.
What is the best way to remove coffee stains from leather seats?
Blot the spill immediately with a dry cloth, then apply a small amount of leather cleaner and wipe gently. For older stains, make a paste with baking soda and water, apply it to the stain, and let it sit for 10 minutes before wiping clean. Always condition the area after treatment.
Is it safe to use a steam cleaner on leather car seats?
Steam cleaners can be safe if used carefully, but they are not recommended for most leather seats. Excessive heat and moisture can damage the leather’s structure and cause cracking. If you do use steam, keep the temperature low and avoid soaking the seats.
How can I prevent my leather seats from cracking?
Regular conditioning is the best way to prevent cracking. Park in the shade or use a sunshade to protect against UV damage. Avoid using harsh cleaners and never let spills sit for long periods. Consistent maintenance keeps leather supple and prevents dryness that leads to cracks.
=== CONCLUSION ===
The best ways to clean leather car seats combine regular maintenance with the right products and techniques. By following the steps outlined in this guide, you can keep your leather seats looking fresh, soft, and protected for years to come. Start today with a simple cleaning session and build a routine that works for your lifestyle.