The Ultimate Guide to Harley Bolt Upgrades and Maintenance
A harley bolt is more than just a small fastener. It is the foundation of your motorcycle’s safety, performance, and appearance. This guide walks you through every type of harley bolt, how to choose the right upgrade, and the best maintenance practices. You will learn expert tips, common mistakes to avoid, and practical steps for bolt replacement at home.
Key Takeaways
- Choose the right material: Steel, stainless steel, titanium, and chrome bolts each offer different benefits for strength, weight, and looks.
- Follow torque specs exactly: Over-tightening or under-tightening can cause serious engine damage or safety issues.
- Always use anti-seize compound: This simple step prevents corrosion and makes future bolt replacement much easier.
- Inspect bolts regularly: Make bolt inspection part of your routine motorcycle maintenance schedule.
- Upgrade visible bolts for style: Chrome and titanium bolts are an affordable way to customize your Harley’s appearance.
- Keep a spare bolt kit: Being prepared for minor repairs on the road saves time and keeps your ride safe.
- Match bolt grade and size exactly: Using the wrong fastener can lead to thread damage and unsafe riding conditions.
📑 Table of Contents
What Is a Harley Bolt and Why It Matters
Every harley bolt is a small but essential fastener that holds your motorcycle together. These bolts connect the engine, frame, exhaust, and body panels. Without them, your Harley would fall apart in seconds.
Many riders overlook the importance of proper fastener hardware. They focus on big upgrades like engines or exhausts. But the truth is, even the best harley performance parts will fail if the bolts holding them are wrong. A harley engine bolt faces extreme heat and pressure. A frame bolt endures constant road vibration. Each one has a specific job to do.
Understanding your harley bolt options gives you more control over your bike. It helps you ride safer, maintain better, and even customize with confidence. Whether you are a first-time owner or a seasoned rider, this knowledge pays off every time you turn the key.
In this guide, we break down everything you need to know. From the different bolt types to choosing the right material, we cover it all. You will also find a step-by-step replacement guide, common mistakes to avoid, and expert tips that real mechanics use every day.
Types of Harley Bolts You Should Know About
Not every bolt on a Harley is the same. Different areas of the bike demand different fasteners based on heat, stress, and exposure. Knowing what each type does helps you make better choices for upgrades and repairs.
Engine and Cylinder Head Bolts
The cylinder head bolt is one of the most important fasteners on your engine. It seals the cylinder head to the engine block under high compression and heat. These harley engine bolts must withstand constant temperature changes and extreme pressure.
If a cylinder head bolt fails, it can cause serious engine damage. Coolant can leak, compression can drop, and the engine can overheat. That is why using the correct grade and size matters so much. Always check your bolt torque specs before installing any engine fastener.
Stock harley bolts are typically made from medium-carbon steel. They work well for standard riding. But if you tune your engine for more power, the increased heat and pressure may require stronger aftermarket bolts. Look for Grade 8 or metric 12.9 bolts for high-performance applications.
Frame and Chassis Bolts
Frame bolts keep your motorcycle structurally sound. They connect the engine mounts, triple tree, swing arm, and subframe to the main chassis. These fasteners take a beating from road vibration, bumps, and everyday riding.
Over time, frame bolts can loosen or fatigue. This creates a safety risk if not caught early. Regular bolt replacement on frame connections is a smart part of your motorcycle maintenance routine. Many riders upgrade to stainless steel bolts for frame applications because they resist corrosion and last longer.
Some Harley owners also choose chrome bolts for visible frame connections. This adds a polished look while still providing solid function. Just make sure the chrome bolts you choose are rated for the stress level of that application.
Exhaust and Performance Bolts
Exhaust bolts face the harshest conditions on any Harley. They deal with extreme heat from the exhaust pipes, corrosive gases, and carbon buildup. Stock exhaust bolts often rust and seize up after a few years.
This is where a bolt upgrade makes a real difference. Aftermarket bolts made from stainless steel or titanium resist heat and corrosion far better than stock hardware. Titanium bolts are especially popular among riders who want harley custom parts that are both lightweight and durable.
If you have a performance exhaust system, the heat is even higher. Choose bolts rated for high-temperature applications. Some riders also use harley dyna bolt kits specifically designed for Dyna models. These kits include pre-sized bolts with the correct torque specs for a perfect fit.
How to Choose the Right Harley Bolt Upgrade
Choosing the right harley bolt upgrade depends on several factors. Material, size, and application all play a role. Let us walk through each one so you can make the best choice for your bike.
Material Matters: Steel vs. Titanium vs. Chrome
The material you pick affects strength, weight, durability, and appearance. Here is a quick comparison of the most common materials used for harley bolt upgrades.
| Material | Strength | Weight | Corrosion Resistance | Best Use |
|---|---|---|---|---|
| Grade 8 Steel | High | Heavy | Moderate | Engine and high-stress applications |
| Stainless Steel | High | Medium | Excellent | Exhaust, frame, and all-weather riding |
| Titanium | Very High | Very Light | Excellent | Performance builds and weight reduction |
| Chrome Plated | Medium | Medium | Good | Visible exterior and custom look |
Steel bolts are the most affordable option and work great for everyday riding. They offer reliable strength for most applications. Stainless steel bolts add excellent corrosion resistance, which is perfect for riders who face rain, salt, and road grime regularly.
Titanium bolts are the premium choice for serious builders. They are incredibly strong yet much lighter than steel. Many riders choose titanium when they want to reduce overall bike weight without sacrificing strength. Chrome bolts are all about looks. They shine bright and give your Harley a polished, custom appearance.
Bolt Size and Thread Compatibility
Every Harley model uses specific bolt sizes and thread pitches. Using the wrong size can strip threads or create unsafe conditions. This is one of the most common mistakes riders make with motorcycle bolt kit purchases.
Common sizes include M6, M8, M10, and M12 bolts across different applications. The thread pitch must match exactly. For example, an M8 x 1.25 bolt will not work in a hole designed for M8 x 1.0. Always double-check before you buy.
When in doubt, take the old bolt to your parts supplier. They can match it exactly. Or consult your Harley owner manual for the correct specifications. Using the right harley parts ensures a safe and secure fit every time.
Torque Specs and Why They Matter
Bolt torque specs are not suggestions. They are engineering requirements that ensure your fasteners hold safely. Over-tightening can strip threads or snap bolts. Under-tightening can cause parts to vibrate loose while riding.
Always use a calibrated torque wrench when installing any harley bolt. Your owner manual lists the correct torque values for every bolt on the bike. Following these specs is one of the easiest ways to prevent costly repairs and keep your ride safe.
Quick tip: Never torque a bolt by feel. Even experienced mechanics use a torque wrench. It takes seconds and saves you from expensive mistakes.
Step-by-Step Guide to Replacing Harley Bolts
Replacing bolts on your Harley does not have to be intimidating. With the right tools and a little patience, you can handle most bolt replacement tasks at home. Here is how to do it right.
Tools You Will Need
Before you start, gather these essential tools:
- Socket set in metric sizes
- Torque wrench
- Penetrating oil (such as WD-40 or PB Blaster)
- Wire brush for cleaning threads
- Anti-seize compound
- New bolts in the correct size and grade
- Safety glasses and gloves
Having the right tools ready saves time and prevents mistakes. Do not try to force a stuck bolt without penetrating oil first. Patience is your best friend when working with harley bolts.
The Replacement Process
Start by cleaning the area around the bolt. Use a wire brush to remove rust and debris from the thread hole. Apply penetrating oil to any stubborn bolts and let it sit for several minutes. This softens rust and makes removal much easier.
Remove the old bolt carefully. If it is stuck, apply more penetrating oil and try again. Never use excessive force, as this can damage the thread hole. Damaged threads in the engine case or frame can turn a simple repair into an expensive one.
Clean the thread hole thoroughly before installing the new bolt. Apply a thin layer of anti-seize compound to the threads. This prevents future corrosion and makes future bolt replacement much easier. It also ensures the bolt torques correctly.
Install the new bolt and tighten it to the correct torque spec. Double-check every bolt before you ride. This simple habit keeps your harley bolt setup safe and reliable for miles to come.
Common Mistakes When Working with Harley Bolts
Even experienced riders make mistakes with bolt work. Knowing what to avoid saves time, money, and keeps you safe on the road.
Using the Wrong Bolt Grade
Not all bolts are created equal. Grade 5, Grade 8, and metric 10.9 and 12.9 bolts have different strength ratings. Using a lower-grade bolt in a high-stress application is dangerous. The bolt could snap under load and cause a serious accident.
Always match the bolt grade to the manufacturer specifications. If your Harley manual calls for a Grade 8 bolt, do not substitute with a Grade 5. The extra strength matters, especially in engine and chassis applications.
Over-Tightening Bolts
This is the number one mistake riders make. Over-tightening strips threads, warps mating surfaces, and can crack engine components. It is a costly error that is completely preventable.
Always use a torque wrench and follow the recommended bolt torque specs. If you are unsure of the correct value, look it up in your service manual or ask a Harley dealer. A few extra minutes of research can save hundreds of dollars in repairs.
Skipping Anti-Seize Compound
Many riders skip anti-seize and regret it later. Without it, bolts can seize from heat and corrosion. This makes future bolt replacement a nightmare. You may end up grinding off a seized bolt, which damages the thread hole and requires more extensive repair.
A small amount of anti-seize compound saves hours of frustration. Apply it to every bolt during installation, especially on exhaust and engine applications. It is one of the simplest and most effective maintenance habits you can adopt.
Ignoring Rust and Corrosion
If you see rust on a bolt, do not just tighten it and move on. Rust weakens the bolt and can cause it to fail under stress. Replace corroded bolts immediately with fresh stainless steel or equivalent hardware.
Regular inspection of your harley bolt setup catches corrosion early. Make this part of your motorcycle maintenance routine, especially after riding in wet or salty conditions. A few minutes of inspection can prevent a bolt from failing on the road.
Expert Tips for Long-Lasting Harley Bolt Performance
Want your harley bolt setup to last for years? Follow these expert tips from experienced Harley mechanics and custom builders.
Apply Anti-Seize on Every Bolt
This is the top tip from pros. Anti-seize compound prevents galling, corrosion, and seizing. Apply it to every bolt during installation, especially on exhaust and engine applications. It is a small step that makes a huge difference in long-term reliability.
Inspect Bolts During Every Oil Change
Make bolt inspection part of your regular motorcycle maintenance routine. Look for signs of loosening, corrosion, or wear. Check visible bolts on the engine, frame, and exhaust. Catching a problem early prevents bigger issues down the road.
Use this time to clean bolts with a wire brush and apply fresh anti-seize if needed. This keeps everything in top shape and makes the next bolt replacement easier if you ever need one.
Keep a Spare Bolt Kit on Hand
Bugs happen. A rock can chip a bolt, or a vibration can loosen one on the road. Keeping a small motorcycle bolt kit in your saddlebag means you are prepared for minor repairs. A basic kit with common sizes and a torque wrench can get you home safely.
Upgrade Visible Bolts for a Custom Look
Many riders upgrade visible bolts to chrome or titanium for a polished, custom appearance. This is an easy and affordable way to personalize your Harley. Aftermarket harley custom parts like bolt kits are widely available for most models.
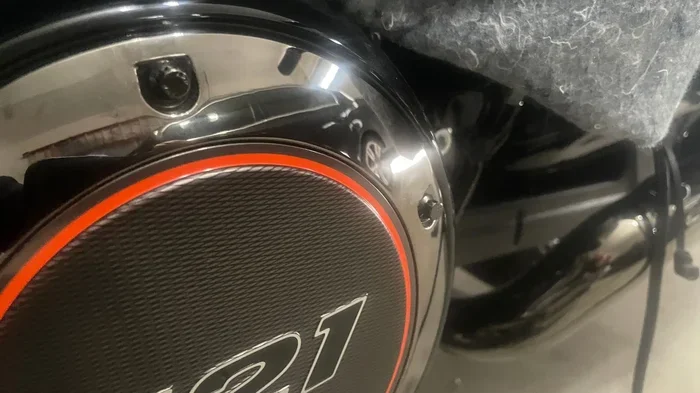
A chrome bolt kit on the engine covers gives your bike a show-ready look. Titanium bolts on the exhaust add a sleek, modern touch. These small upgrades make a big visual impact without breaking the bank.
Final Thoughts
Your Harley is more than a motorcycle. It is a machine built with passion and precision. Every harley bolt contributes to that precision. Taking the time to choose the right bolts and maintain them properly pays off in performance, safety, and longevity.
Whether you are doing a full engine rebuild or a simple bolt replacement, the principles remain the same. Use the right material, follow the torque specs, and never skip anti-seize. Your Harley will reward you with miles of reliable, enjoyable riding.
Start your harley bolt upgrade journey today. Your bike deserves the best, and now you have the knowledge to give it exactly that. Ride safe, ride smart, and keep those bolts tight.
Frequently Asked Questions
What is the best material for a harley bolt upgrade?
Stainless steel is the best all-around choice for most riders. It offers excellent strength, corrosion resistance, and affordability. Titanium is the top pick for performance builds where weight reduction matters. Chrome bolts are best for visible applications where you want a polished custom look.
How often should I inspect my harley bolts?
Inspect your bolts at least every oil change, which is typically every 3,000 to 5,000 miles. Also check them after any long ride or if you notice unusual vibrations. Regular inspection catches loose or corroded bolts before they become serious problems.
Can I use any bolt for my Harley engine?
No. You must use bolts that match the correct size, thread pitch, and grade specified by Harley-Davidson. Using the wrong bolt can strip threads, cause engine leaks, or lead to catastrophic failure. Always refer to your service manual or consult a dealer for the correct specifications.
Do I need anti-seize compound on every bolt?
Yes, it is best practice to apply anti-seize to every bolt during installation. It prevents corrosion, galling, and seizing. This is especially important on exhaust bolts and engine bolts where heat and moisture create the perfect conditions for corrosion.
What torque wrench should I use for harley bolt work?
A digital or beam-style torque wrench that covers the range of 5 to 80 foot-pounds works well for most Harley applications. Make sure it is properly calibrated. A torque wrench is the single most important tool for safe and correct bolt installation.
Are aftermarket harley bolt kits worth the money?
Absolutely. Aftermarket bolt kits are often made from higher-quality materials than stock hardware. They come in attractive finishes like chrome and titanium. They also include all the bolts you need for a specific job, saving you time and guesswork. For the price, they offer excellent value.