How to Clean a Grill and Keep It Ready for BBQ Season
Knowing how to clean a grill properly keeps your food safe, your flavors fresh, and your equipment lasting for years. This guide walks you through every step, from removing built-up grease to deep cleaning different grill types. You will also find quick tips, common mistakes, and expert advice to make grill maintenance effortless.
Nothing ruins a great barbecue faster than a dirty grill. Grease buildup, old food particles, and rust can all affect the taste of your food and the life of your grill. If you have been wondering how to clean a grill the right way, you are in the right place.
This guide covers everything you need to know about grill cleaning and grill maintenance. Whether you own a charcoal grill, a gas grill, or a pellet grill, the steps below will help you keep it in top shape. We will walk you through the tools you need, the process step by step, and tips to make the job faster. By the end, you will know exactly how to keep your BBQ grill ready for every cookout.
Let us start with why cleaning your grill matters so much.
Key Takeaways
- Clean your grill after every use: This prevents grease buildup and makes deep cleaning much easier.
- Use the right tools: A quality grill brush, scraper, and cleaner make the job faster and more effective.
- Know your grill type: Charcoal and gas grills need slightly different cleaning approaches.
- Season your grill grates: Oiling the grates after cleaning prevents rust and improves food release.
- Cover your grill: A good grill cover protects it from the elements and reduces cleaning frequency.
- Deep clean at least twice a season: A thorough clean keeps your grill performing at its best.
- Avoid common mistakes: Using the wrong cleaners or skipping the grease trap causes long-term damage.
📑 Table of Contents
Why Cleaning Your Grill Matters
Some people skip cleaning their grill after a cookout. They figure the heat from the next session will burn off the old residue. While that helps a little, it does not do the full job. Here is why taking the time to deep clean your grill is worth the effort.
Food Safety
Old food stuck to your cooking grates can harbor bacteria. When you place fresh food on a dirty surface, you risk cross-contamination. This is especially true when you cook meat at lower temperatures or use the grill for indirect cooking.
Better Flavor
Grease and residue from previous meals can affect the taste of your food. Fresh burgers and vegetables deserve a clean cooking surface. A well-maintained grill lets the natural flavors of your food shine through.
Longer Equipment Life
Grease causes corrosion. Over time, it eats away at metal parts, burners, and heat plates. Regular grill maintenance saves you money by extending the life of your equipment.
Better Performance
A clean grill heats more evenly. Grease buildup in the grease trap and burner tubes can block airflow. This leads to hot spots, uneven cooking, and wasted fuel.
What You Need to Clean a Grill
Before you start, gather your supplies. Having everything ready makes the process smoother and faster. Here is a simple checklist of grill cleaning tools and products you will need.
Essential Tools
- Grill brush with stainless steel bristles
- Grill scraper for tough residue
- Wire brush for detailed cleaning
- Stiff nylon scrub pad
- Putty knife or flat spatula
- Bucket of warm soapy water
- Microfiber cloths or paper towels
- Grill gloves for hand protection
Cleaning Products
- Commercial grill cleaner spray
- White vinegar and water solution
- Baking soda paste (for tough stains)
- Dish soap
- Grill-specific degreaser
- Vegetable oil for seasoning
Quick Tip
Keep a dedicated grill cleaning kit near your grill. When tools are always within reach, you are more likely to clean up after each use. A small caddy or bucket works perfectly for this.
Step-by-Step Guide to Clean a Grill
Now let us get into the actual process. Follow these steps whether you are doing a quick post-cookout clean or a thorough deep clean of your grill.
Step 1: Let the Grill Cool Down
Wait at least 30 minutes after cooking before you start cleaning. A warm grill loosens grease and food particles, making them easier to remove. But you still need it cool enough to handle safely. Use your grill gloves to protect your hands throughout the process.
Step 2: Remove the Grates
Take off the grill grates and set them aside. This gives you access to the interior surfaces that collect grease and debris. If your grill has removable heat plates or flavorizer bars, take those off too.
Step 3: Scrape the Grates
Use your wire grill brush to scrub both sides of the grates. Apply firm pressure and work in sections. For stubborn buildup, spray the grates with grill cleaner and let it sit for five to ten minutes before scrubbing again.
Step 4: Clean the Interior
Use a putty knife to scrape grease and carbon buildup off the walls and heat plates. Wipe everything down with a damp cloth. For tough grease stains, make a paste of baking soda and water. Apply it, let it sit for fifteen minutes, then scrub with a nylon pad.
Step 5: Clean the Grease Trap
The grease trap or drip pan collects a lot of oil and fat. Remove it and empty the contents into a disposable container. Wash it with warm soapy water. If it is very dirty, soak it for twenty minutes before scrubbing.
Step 6: Clean the Burners (Gas Grills)
For gas grills, check the burner tubes for blockages. Use a thin wire or pipe cleaner to clear any debris from the ports. Clogged burners cause uneven heat, which ruins your cooking results. This is one of the most overlooked parts of grill prep.
Step 7: Wipe Down the Exterior
Use a damp cloth with mild dish soap to clean the outside of the grill. Wipe down the lid, the control knobs, and the side shelves. For stainless steel exteriors, use a cleaner made for stainless steel to avoid streaking.
Step 8: Reassemble and Season
Once everything is clean and dry, put the parts back together. Before you replace the grates, rub a thin layer of vegetable oil on them. This seasons the grill and prevents rust. It also makes food release easier during your next cookout.
How to Clean Different Grill Types
Not all grills are the same. The type of grill you own affects your cleaning approach. Here is how to handle the most common grill types.
Charcoal Grills
Charcoal grills build up a lot of ash and carbon residue. After each use, let the coals cool completely, then remove the ash. Use a dedicated ash tool or a small vacuum designed for grills. The grates need regular scrubbing with a wire brush. Every few months, do a full interior cleaning with warm soapy water.
Gas Grills
Gas grills require attention to the burner tubes and grease management system. The grates and heat plates need regular scrubbing. Pay special attention to the flavorizer bars, which catch grease and drippings. A deep clean every few months keeps gas grills performing well.
Pellet Grills
Pellet grills have unique parts like the hopper, auger, and fire pot. Empty the hopper of unused pellets regularly. Clean the fire pot of ash buildup. The grates still need the same basic scrubbing as other grills. The grease management system also needs periodic emptying and washing.
Comparison Table: Grill Types and Cleaning Needs
| Grill Type | Cleaning Frequency | Key Areas to Focus On | Difficulty Level |
|---|---|---|---|
| Charcoal Grill | After every use | Grates, ash pan, interior walls | Easy |
| Gas Grill | After every use | Grates, burners, grease trap, heat plates | Moderate |
| Pellet Grill | After every use | Grates, fire pot, hopper, auger | Moderate |
| Electric Grill | After every use | Grates, drip tray, cooking plates | Easy |
Maintaining Your Grill Between Deep Cleans
A full grill deep clean is great, but daily habits make a huge difference too. Here are simple routines that keep your grill in great shape between thorough cleaning sessions.
Brush the Grates After Every Use
While the grill is still warm, give the grates a quick brush. This removes food particles before they harden into stubborn residue. A five-minute habit saves you thirty minutes of scrubbing later.
Empty the Grease Trap Regularly
Check the grease trap before every cookout. A full drip pan can cause flare-ups and uneven cooking. Empty it when it is about one-third full.
Use a Grill Cover
A good grill cover protects your grill from rain, snow, and UV damage. It keeps debris out and reduces the amount of cleaning you need. Make sure the cover fits snugly and is made of breathable material to prevent mold.
Store Your Grill Properly
If you store your grill outdoors, keep it covered at all times. For long-term storage, disconnect the gas line, remove the propane tank, and store it in a dry place. This simple step prevents rust and keeps your grill parts in good condition.
Expert Insight
According to grill experts, the best time to clean your grill is right after cooking while the grates are still warm. The heat softens grease and makes it much easier to wipe away. This one habit alone dramatically reduces the effort needed for deeper cleaning sessions.
Common Mistakes to Avoid When Cleaning Your Grill
Even with the best intentions, people make mistakes that can damage their grill or reduce its performance. Here are the most common errors to watch out for.
Using the Wrong Cleaner
Never use household cleaners like oven cleaner on your grill. These chemicals leave residues that can transfer to your food. Stick to products made specifically for grills or use natural options like vinegar and baking soda.
Skipping the Grease Trap
A neglected grease trap leads to grease fires and poor airflow. Make cleaning the drip pan a non-negotiable part of your routine.
Ignoring Rust
Small rust spots can be sanded off and treated. But if you ignore them, they spread and weaken the structure of your grill. Check for rust regularly, especially on the grates and exterior surfaces.
Using a Wire Brush on Porcelain Grates
Wire bristles can scratch porcelain-coated grates. Use a nylon brush or a brass brush instead. The damage from wire brushes on coated surfaces can be costly to repair.
Not Drying Parts After Washing
Water left on metal parts causes rust. Always dry grates, heat plates, and other components thoroughly before reassembling your grill. Use a clean towel or let them air dry in the sun.
Quick Tip
Replace your grill brush when the bristles start to wear out. A worn brush does not clean effectively and can leave bristle fragments on the grates. Check your brush every few weeks and swap it out when needed.
Final Thoughts on Grill Cleaning
Learning how to clean a grill properly is one of the best investments you can make for your outdoor cooking setup. A clean grill cooks better, lasts longer, and keeps your food safe. The steps in this guide make the process simple and manageable, no matter what type of grill you own.
Start with the basics. Brush your grates after every session. Clean the grease trap regularly. Do a thorough deep clean at least twice a season. These habits keep your BBQ grill in excellent condition and ready for every gathering.
Remember, grill maintenance does not have to be a chore. With the right tools, the right products, and a simple routine, it becomes second nature. Your grill will thank you with better performance, better flavors, and more years of reliable service.
Now that you know exactly what to do, it is time to grab your brush and get started. Your next cookout will taste even better on a clean, well-maintained grill.
Frequently Asked Questions
How often should I clean my grill?
You should brush the grates after every use and do a deep clean at least twice per grilling season. Regular cleaning prevents grease buildup and keeps your grill performing at its best.
Can I use vinegar to clean my grill?
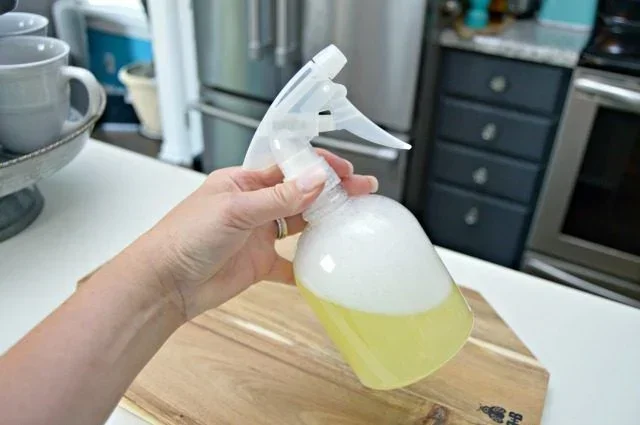
Yes, vinegar is a safe and effective natural grill cleaner. Mix equal parts white vinegar and water in a spray bottle, apply it to the grates and interior surfaces, let it sit for a few minutes, then wipe clean with a damp cloth.
What is the best grill brush to use?
A stainless steel wire grill brush works well for most grates. For porcelain or coated grates, choose a nylon or brass brush to avoid scratching the surface. Replace your brush regularly for the best results.
How do I remove rust from my grill grates?
Soak the grates in a solution of vinegar and water for thirty minutes, then scrub with a wire brush. For heavy rust, use a paste of baking soda and water, apply it to the rusted areas, and scrub gently. Rinse and dry thoroughly afterward.
Should I clean my grill while it is hot or cold?
The best approach is to clean while the grill is still warm but cool enough to handle safely. The heat loosens grease and food particles, making them easier to remove. Wait at least thirty minutes after cooking before you start.
Can I put grill grates in the dishwasher?
It depends on the material. Cast iron grates should never go in a dishwasher because the harsh detergents strip the seasoning. Porcelain-coated and stainless steel grates can usually be dishwasher safe, but hand washing with warm soapy water is always the gentler option.