Basic Car Detailing Tips Every Car Owner Should Know
Basic car detailing keeps your vehicle looking great and protects its value. This guide covers simple steps for cleaning both the exterior and interior of your car. You will learn the right tools, products, and techniques to achieve professional results at home. With regular care, your car stays shiny and fresh for years. These car detailing tips are easy enough for any beginner to follow.
Key Takeaways
- Start with the right tools: A basic car detailing kit makes the job faster and easier.
- Follow the two-bucket method: This prevents scratches and keeps your paint safe during washing.
- Clean inside and out: Both areas matter equally for a truly detailed car.
- Use a clay bar: It removes bonded contaminants that soap alone cannot reach.
- Wax or sealant protects paint: Regular application shields against UV rays and environmental damage.
- Avoid common mistakes: Using the wrong products or skipping drying can cause damage.
- Detail every 3 to 6 months: Consistent maintenance keeps your car looking its best year-round.
📑 Table of Contents
What Is Basic Car Detailing?
Basic car detailing means thoroughly cleaning and restoring your vehicle to look its best. It goes far beyond a quick drive-through car wash. You clean every surface, inside and out, with care and attention to detail.
Think of it as giving your car a full spa day. You wash the paint, clean the seats, vacuum the floors, and shine the tires. The goal is simple: make your car look and feel like new again.
Many people think detailing is only for luxury cars or professionals. That is not true at all. Anyone can learn basic car detailing with a little time and the right supplies. You do not need expensive equipment to get great results.
Regular detailing also protects your car’s paint and interior surfaces. Dirt, UV rays, and everyday wear can cause damage over time. A good cleaning routine slows this process and keeps your vehicle looking sharp.
Essential Tools and Products for Basic Car Detailing
Before you start, gather the right tools. Having everything ready makes the process smoother and more enjoyable. You do not need a huge budget, just the essentials.
What You Need in Your Car Detailing Kit
Here is a simple list of items every beginner should have:
- Two buckets — one for soapy water and one for rinsing your mitt
- Car shampoo — a pH-safe formula designed for automotive paint
- Microfiber wash mitt — soft and gentle on your car’s surface
- Microfiber towels — at least four or five for drying and wiping
- Clay bar kit — removes embedded dirt and smooths the paint
- Car wax or sealant — provides a protective layer after washing
- Interior cleaner — safe for dashboards, seats, and trim
- Vacuum cleaner — a standard household vacuum works fine
- Glass cleaner — streak-free formula for windows and mirrors
- Tire dressing — gives tires a deep, rich shine
- Brush set — soft brushes for crevices, vents, and upholstery
You can buy most of these items in a starter car detailing kit online or at any auto parts store. Investing in microfiber cloths is especially important. They are gentle, absorbent, and won’t scratch your paint.
Exterior Detailing Steps
The exterior is the first thing people notice. A thorough exterior detailing routine makes your car look incredible and protects the paint from the elements.
Step 1: Rinse Thoroughly
Start by rinsing your entire car with water. This removes loose dirt, mud, and debris. Use a gentle stream from a hose — never a high-pressure washer too close to the paint. Rinse from the top down so dirt flows off naturally.
Skipping this step is a common mistake. Rubbing a dirty mitt on a dusty car creates tiny scratches called swirl marks. Always rinse first to keep your car wash safe and effective.
Step 2: Wash Using the Two-Bucket Method
Fill one bucket with soapy water and the other with clean rinse water. Dip your microfiber mitt into the soap bucket, wash one section of the car, then rinse the mitt in the clean water bucket before dipping again.
This simple technique is called the two-bucket method. It prevents you from dragging dirt back across your paint. Work in sections from top to bottom, and never use dish soap — it strips away protective wax layers.
Step 3: Dry With a Microfiber Towel
After washing, dry your car immediately with a clean microfiber towel. Pat the surface gently rather than rubbing. This prevents water spots and streaks from forming.
Letting your car air dry can leave mineral deposits and watermarks. Take the extra few minutes to dry it properly. Your paint will thank you later.
Step 4: Use a Clay Bar for Deep Cleaning
A clay bar treatment removes contaminants stuck to your paint. Spray a lubricant on a small section, then glide the clay bar gently across the surface. You will feel the roughness smooth out under the bar.
This step is not needed every time you wash. Use it once a month or whenever your paint feels rough after a wash. A clay bar makes your paint look noticeably clearer and helps wax adhere better.
Step 5: Polish and Wax
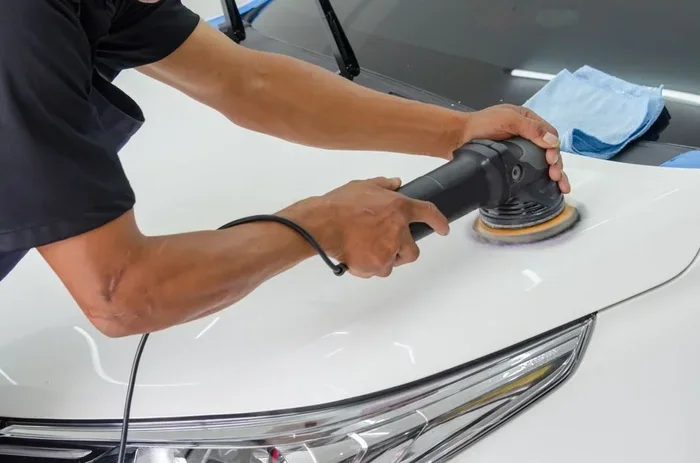
Polishing removes light swirl marks and restores shine. Apply a small amount of polish to a foam pad and work it in circles across the paint. Follow the product instructions carefully.
After polishing, apply a coat of wax or sealant. Waxing your car creates a protective barrier against UV rays, bird droppings, tree sap, and rain. It also gives your paint a deep, glossy finish that turns heads.
Use a clean microfiber towel to buff off excess wax. Work in small sections for an even coat. A good quality car wax or ceramic sealant can last several months with proper application.
Step 6: Clean Windows and Tires
Finish the exterior with glass cleaner and tire dressing. Spray glass cleaner on a microfiber towel — not directly on the glass — and wipe until streak-free. For tires, apply a water-based dressing with a foam applicator for a rich, matte or glossy finish.
Clean tires and spotless windows make a huge difference in your car’s overall appearance. These small touches elevate your exterior detailing from good to exceptional.
Interior Detailing Steps
The interior is where you spend most of your time. A clean cabin makes every drive more pleasant and keeps your car upholstery looking fresh for years.
Step 1: Remove Trash and Personal Items
Start by taking everything out of your car. Remove trash, loose items, floor mats, and seat covers. This gives you a blank canvas to work with. Shake out your mats outside and set them aside for cleaning.
Many people skip this step and try to clean around clutter. Trust me — removing everything first makes the entire process faster and more effective.
Step 2: Vacuum Every Surface
Use your vacuum cleaner to thoroughly clean the seats, carpet, floor, trunk, and all crevices. Use the crevice tool for tight spaces between seats and center console.
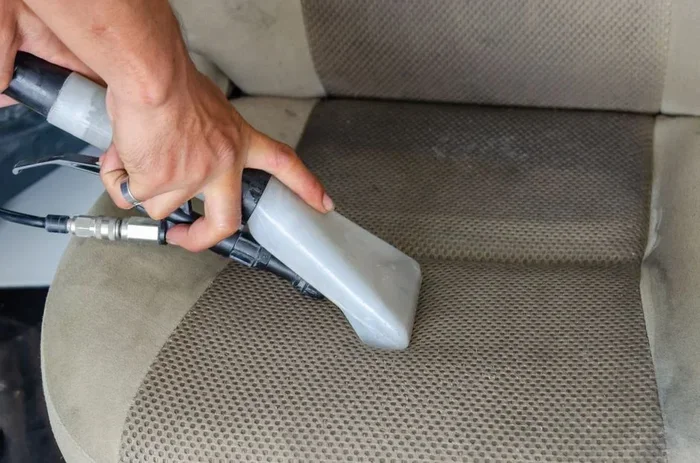
Go over each area multiple times if needed. For car upholstery and carpet stains, a handheld steam cleaner works wonders. Vacuuming is the foundation of a clean interior — do not rush through it.
Step 3: Clean the Dashboard and Trim
Spray interior cleaner on a microfiber towel — never directly on surfaces — and wipe down the dashboard, center console, and door panels. Use a soft brush for vents and buttons that collect dust.
After cleaning, apply a protectant to plastic and vinyl surfaces. This prevents fading and cracking caused by sun exposure. A matte finish protectant looks more natural and avoids that greasy, shiny look.
Step 4: Treat Leather Seats
If your car has leather seats, use a leather cleaner followed by a leather conditioner. Cleaning removes dirt and oils, while conditioning keeps the leather soft and prevents cracking.
Apply the conditioner with a microfiber cloth in gentle circular motions. Let it absorb for a few minutes, then buff off any excess. Leather seat care is one of the most rewarding parts of interior detailing.
Step 5: Freshen the Air
Finish by cleaning your air vents with a small brush or compressed air. Place an air freshener or hang a vent clip for a pleasant scent. Some people also sprinkle baking soda on carpets before vacuuming to eliminate odors.
A fresh-smelling interior makes your car feel brand new. This simple step completes your interior cleaning and ties everything together beautifully.
Common Mistakes to Avoid
Even with the best intentions, beginners often make mistakes. Knowing what to avoid saves time, money, and protects your car’s finish.
Using Household Cleaners
Dish soap, window cleaner, and all-purpose household sprays can damage your car’s paint and interior surfaces. These products are too harsh for automotive use. Always choose products specifically formulated for cars.
Skipping the Dry Step
Letting your car air dry after a wash leaves water spots and mineral marks. These can be hard to remove and may damage the clear coat over time. Always dry your car thoroughly with a soft microfiber towel.
Using the Wrong Cloth
Avoid old t-shirts, paper towels, or rough fabrics. These can scratch your paint and leave lint behind. Microfiber cloths are the gold standard for car detailing because they are soft and highly absorbent.
Detailing in Direct Sunlight
Working in direct sunlight causes soap and wax to dry too quickly. This leaves streaks and spots that are difficult to remove. Choose a shaded area or work on a cloudy day for the best results.
Neglecting the Interior
Many people focus only on the exterior. But a dirty interior affects your driving experience and can reduce resale value. Always clean both sides of your car for a complete detailing job.
How Often Should You Detail Your Car?
The frequency depends on your driving habits, climate, and how much you use your car. As a general rule, a full basic car detailing session every three to six months works well for most owners.
If you drive daily in harsh conditions — salt, dust, heavy rain — consider detailing more often. A quick wash every week and a thorough interior clean once a month keeps your car in great shape between full sessions.
Seasonal changes are also a good reason to detail. Spring cleaning removes winter salt and grime. Fall detailing prepares your car for cold weather ahead. Consistent car maintenance like this preserves your vehicle’s appearance and value.
Remember, detailing is not just about looks. It protects your investment. Regular care prevents paint oxidation, interior wear, and rust. Your future self will thank you when your car still looks amazing years from now.
Expert Tips for Better Results
Want to take your car detailing skills to the next level? Here are some pro tips that make a real difference.
- Work top to bottom: Gravity pulls dirt downward, so start at the roof and work your way to the lower panels.
- Use separate towels for different areas: Keep one set for paint, one for glass, and one for interior surfaces to avoid cross-contamination.
- Don’t forget the door jambs: These hidden areas collect dirt and grime. Wipe them down during every detailing session.
- Apply wax in thin layers: Multiple thin coats outperform one thick coat. They cure better and last longer.
- Keep a detailing journal: Note what products you used and when. This helps you track what works best for your car.
- Invest in a quality car shampoo: A good shampoo cleans effectively without stripping wax or sealant from your paint.
Final Thoughts on Basic Car Detailing
Basic car detailing is one of the best things you can do for your vehicle. It keeps your car looking stunning, protects the paint and interior, and maintains resale value. The process is simpler than most people think.
With the right tools, a little patience, and the steps in this guide, anyone can achieve professional-quality results at home. Start with a basic wash and build from there. Each session makes you more confident and skilled.
Your car is one of your biggest investments. Treating it with regular car detailing care pays off in appearance, longevity, and pride of ownership. Grab your car detailing kit this weekend and give your vehicle the attention it deserves.
Remember, consistency is key. A little effort every few weeks makes a world of difference. Keep your car clean, protected, and looking its absolute best for many years to come.
Frequently Asked Questions
What is the difference between a car wash and basic car detailing?
A car wash is a quick surface clean that removes dirt and grime. Basic car detailing goes much deeper. It includes washing, drying, clay treatment, polishing, waxing, and thorough interior cleaning. Detailing restores and protects your car’s surfaces, while a wash just cleans the exterior.
Do I need expensive products for basic car detailing?
No, you do not need expensive products to get great results. A basic car detailing kit with a good shampoo, microfiber towels, a clay bar, and wax is all you need. Focus on quality over quantity, and always choose products designed for automotive use.
How long does a basic car detailing session take?
A complete session takes about two to four hours depending on the size of your vehicle and how detailed you go. If you are new to it, give yourself extra time. As you get familiar with the process, you will become faster and more efficient.
Can I detail my car in my driveway?
Absolutely. Most basic car detailing can be done in your driveway or garage. Just make sure you have a water source, a flat surface to work on, and shade to avoid direct sunlight. A flat lawn is ideal because soapy water can soak into the grass safely.
Is waxing necessary if I use a ceramic sealant?
You do not need to do both. A ceramic sealant provides excellent protection and lasts longer than traditional wax. However, wax is easier to apply and gives a warm, natural glow. Choose one based on your preference and how much protection you want for your paint.
What is the best way to clean car upholstery?
For fabric seats, use an upholstery cleaner and a soft brush, then blot with a clean towel. For leather seats, use a dedicated leather cleaner followed by a conditioner. Always test any product on a small hidden area first to make sure it does not cause discoloration or damage.
=== CONCLUSION ===
Basic car detailing is a rewarding routine that anyone can master. It keeps your vehicle looking its best and protects your investment for the long haul. With the right tools, a simple process, and regular effort, your car will turn heads every time you drive by.
Start small if you are new to this. Master the wash and dry first, then add polishing and waxing to your routine. Over time, interior cleaning will become second nature. The more you do it, the better your results will be.
Follow these car detailing tips consistently, and you will notice a real difference in how your car looks and feels. Your vehicle deserves the best care you can give it. Happy detailing!