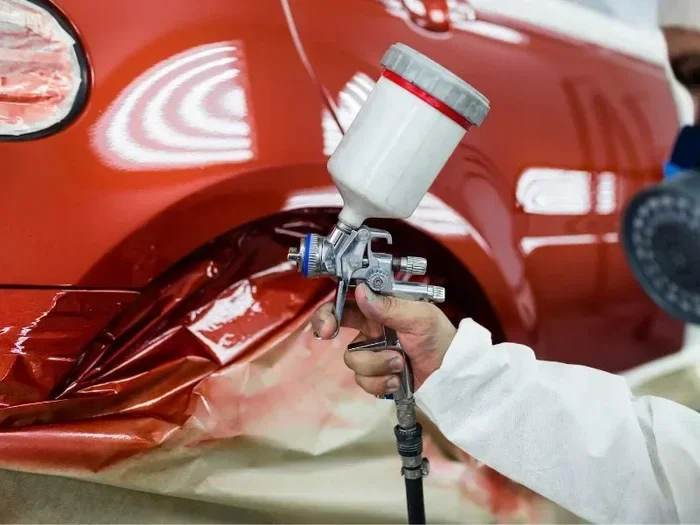
How to Paint Your Car with a Can Like a Professional
You can totally paint your car with a can and get great results without spending a fortune. This guide walks you through every step, from picking the right spray paint to applying the perfect clear coat. Whether you’re doing a full respray or a rust repair, DIY automotive painting is easier than you think.
Key Takeaways
- Choose the right spray paint: Use automotive-grade enamel or urethane spray cans designed for car bodies.
- Surface prep is everything: Sanding, cleaning, and priming properly make or break your paint job.
- Apply thin layers: Multiple light coats always beat one thick coat for a smooth finish.
- Work in a clean area: Dust, wind, and humidity can ruin your finish fast.
- Finish with clear coat: It protects your color and gives your car that professional shine.
📑 Table of Contents
- Why Paint Your Car with a Can?
- Getting Ready: Tools and Materials You’ll Need
- Step-by-Step: How to Paint Your Car with a Can
- Surface Preparation: The Most Important Step
- Applying Primer and Base Coat
- Finishing with Clear Coat and Polishing
- Common Mistakes to Avoid
- Expert Insights
- Comparison: Spray Can vs. Professional Paint Job
- Conclusion
Why Paint Your Car with a Can?
So you’re thinking about painting your car with a can. Maybe your ride has some rust spots, or the paint is looking pretty sad. Whatever the reason, you’re in the right place.
Professional paint jobs can cost anywhere from $500 to $5,000 or more. But with spray paint car techniques, you can get impressive results for a fraction of that price. A full can setup might only set you back $50 to $150.
That said, this isn’t a shortcut. DIY car paint takes patience and effort. But when you do it right, the results genuinely surprise people. Let’s walk through everything you need to know.
When Does Painting with a Can Make Sense?
Here are some situations where spray can paint works great:
- Small to medium rust repair
- Full panel respray
- Color matching for touch-ups
- Custom color changes
- Car restoration projects on a budget
For full vehicle vehicle refinishing, a spray can approach takes more time but absolutely delivers quality results.
Getting Ready: Tools and Materials You’ll Need
Before you start spraying, gather everything you need. Nothing ruins a paint job faster than stopping mid-way because you forgot something.
Essential Supplies
- Automotive spray paint cans (color and clear coat)
- Primer spray cans (high-build primer)
- Sandpaper (180, 320, 400, and 800 grit)
- Sanding block or sponge
- Tack cloths
- Masking tape and newspaper or plastic sheeting
- Safety gear (respirator mask, gloves, safety glasses)
- Clean rags and wax/grease remover
- Paint booth or large tarp for coverage
Choosing the Right Spray Paint
Not all spray cans are equal. For car body paint, always go with automotive-grade products. Here’s a quick breakdown:
- Enamel spray paint: Durable and glossy. Great for most car surfaces.
- Urethane spray paint: Superior durability and finish. Best for long-lasting results.
- Acrylic spray paint: Easy to use but less durable for automotive use.
For best results, buy from the same brand for primer, base color, and clear coat. This ensures compatibility and better color matching.
Step-by-Step: How to Paint Your Car with a Can
This is where the real work happens. Follow these steps carefully for a professional paint job that turns heads.
Step 1: Plan Your Project
Pick a day with low humidity and minimal wind. Ideally, temperatures should be between 65°F and 80°F. Direct sunlight can cause issues too, so work in a shaded area or garage.
Decide whether you’re painting a full panel or just a section. This affects how much prep work and paint you’ll need.
Step 2: Mask Off the Area
Use masking tape and newspaper or plastic to cover everything you don’t want painted. Be thorough around edges and trim pieces. Clean tape lines make a huge difference in your final look.
Step 3: Apply the Paint
Hold the can about 10 to 12 inches from the surface. Always sweep in smooth, even passes. Overlap each pass by about 50%. Start spraying slightly before the panel and stop slightly after. This prevents hard edges.
Step 4: Let It Cure
Follow the can’s instructions for drying time between coats. Usually 15 to 30 minutes between paint layers works well. Full cure times vary but often take 24 to 48 hours.
Surface Preparation: The Most Important Step
Here’s a truth most people skip: surface preparation matters more than the paint itself. A well-prepped surface with cheap paint looks better than a poorly prepped surface with expensive paint.
Cleaning the Surface
Start by washing the car thoroughly. Remove all dirt, grease, and wax. Use a wax and grease remover on the area you’re painting. This strips invisible contaminants that ruin adhesion.
Wipe the surface with a tack cloth right before painting. These little cloths pick up dust particles you’d never see.
Sanding for Better Adhesion
Sanding creates a texture that helps paint grip. Here’s the typical progression:
- 180 grit: Removes old paint, rust, or rough spots.
- 320 grit: Smooths out scratches and uneven areas.
- 400 to 800 grit: Final smoothing before primer.
Always sand in circular motions for an even finish. Wipe away all dust with a damp cloth after sanding.
Fixing Rust and Dents
If you have rust, treat it before painting. Use a rust converter or remover product. For dents, consider a dent puller or fill with body filler, then sand smooth. Rust prevention during this stage saves you headaches later.
Applying Primer and Base Coat
Primer is the bridge between your bare metal and the color paint. Skipping it leads to peeling and poor adhesion. Never skip primer.
How to Apply Primer Properly
Shake the primer can vigorously for at least two minutes. Hold it 10 to 12 inches from the surface. Apply thin, even coats. Two to three coats usually do the trick.
Let each coat dry fully before adding the next. After the final primer coat, let it dry for at least 24 hours. Then wet-sand with 800 grit paper for a glass-smooth surface.
Base Coat Application
Now the fun part. Automotive finish color goes on next. Apply the base coat in multiple thin layers. Aim for four to six light coats, waiting 15 to 20 minutes between each.
Watch for drips and runs. If you see one forming, stop and let it dry. Trying to fix wet drips makes everything worse. Each layer should look slightly transparent — never thick and gloopy.
Quick Tips for Base Coat
- Practice your spray technique on cardboard first.
- Keep the can moving at all times.
- Work in sections, overlapping your passes.
- Check your progress under different lighting.
Finishing with Clear Coat and Polishing
The clear coat is what protects your paint job and gives it that deep, glossy shine. Think of it as the armor for your color. Never skip this step.
Applying Clear Coat
Use the same technique as your base coat: thin, even, overlapping passes. Apply three to four coats of clear, waiting 20 to 30 minutes between coats. Some automotive clear coat products recommend longer dry times, so check the label.
After the final clear coat, let everything cure for at least 48 hours before touching it. Full hardness can take up to a week in some cases.
Wet Sanding and Buffing
Once fully cured, wet-sand the surface with 2000 grit or higher sandpaper. This removes any minor imperfections. Then use a polishing compound and buffer to bring back the shine.
This step takes your DIY car paint from homemade to professional-looking. Don’t rush it. Take your time and enjoy the transformation.
Aftercare and Maintenance
Wait at least two weeks before waxing your freshly painted area. During that time, keep the car clean and avoid harsh chemicals. After that, regular car detailing practices will keep your finish looking fresh for years.
Common Mistakes to Avoid
Even with good materials, mistakes can wreck your paint job. Here are pitfalls to steer clear of:
- Painting in humid conditions: Moisture causes clouding and poor adhesion.
- Skipping primer: Paint peels off without proper primer.
- Spraying too close: Gets too thick and causes runs.
- Rushing between coats: Not enough dry time leads to wrinkling.
- Ignoring dust: Even tiny particles create bumps in the finish.
- Using hardware store paint: Always use automotive-grade products for automotive painting.
Expert Insights
Professional painters share one consistent tip: patience wins. The difference between a DIY car paint job that looks amateur and one that looks professional is simply the time you invest in prep and drying. Rushing through steps is the number one reason home paint jobs fail.
Another insider tip: work in stages. Don’t try to finish everything in one day. Primer one day, base coat the next, clear coat another day. This approach gives you better control and consistently better results.
Comparison: Spray Can vs. Professional Paint Job
| Factor | Spray Can (DIY) | Professional Shop |
|---|---|---|
| Cost | $50-$150 | $500-$5,000+ |
| Time | 2-4 days | 1-2 weeks |
| Durability | 3-7 years | 10+ years |
| Finish Quality | Very Good | Excellent |
| Skill Needed | Moderate | Professional Training |
As you can see, painting your car with a can offers solid value. The finish quality is impressive for the cost, especially when you follow proper techniques.
Conclusion
Learning how to paint car with can is a rewarding skill. It saves money, builds confidence, and can genuinely transform your vehicle. The key to success lies in thorough surface preparation, patience between coats, and quality automotive products.
Start small if you’re new — maybe a rust spot or a single panel. As your skills grow, you can take on bigger projects. Remember, every professional painter started somewhere, and car restoration with spray cans is a great way to begin.
Grab your cans, prep your surface, and get spraying. Your dream automotive finish is closer than you think.
Frequently Asked Questions
Can I paint my entire car with spray cans?
Yes, you can paint a full car with spray cans, but it takes significant time and patience. You’ll need around 20 to 30 cans for a complete respray. Multiple thin coats of primer, base color, and clear coat are essential for a smooth, even finish across the entire vehicle.
How long does a spray paint car finish last?
A well-prepared and properly applied spray paint car finish typically lasts 3 to 7 years. Using automotive-grade enamel or urethane paint and applying a quality clear coat significantly extends durability. Regular car detailing and avoiding harsh environments also help maintain the finish.
Do I need a primer before spray painting my car?
Absolutely yes. Primer creates a bonding layer between bare metal and paint. Without it, paint peels quickly and adhesion is poor. A high-build automotive primer specifically designed for car body paint gives the best results and ensures long-lasting coverage.
What’s the best spray paint brand for cars?
Popular brands for automotive spray painting include Rust-Oleum Automotive, VHT, and Dupli-Color. These brands offer primer, color, and clear coat systems designed to work together. Using products from the same brand improves color matching and finish consistency.
How do I match my car’s existing paint color?
Find your vehicle’s paint code, usually located on a sticker inside the driver’s door jamb or under the hood. Enter this code on the spray paint manufacturer’s website or contact their support team. Many brands offer custom color-matching services for accurate touch up paint and respray colors.
Is spray painting a car better than brush painting?
Yes, for automotive painting, spray cans deliver a smoother, more even finish than brushes. Brushes leave visible strokes and uneven texture. Spray cans distribute paint in fine, uniform layers, making them the preferred method for DIY car paint projects.