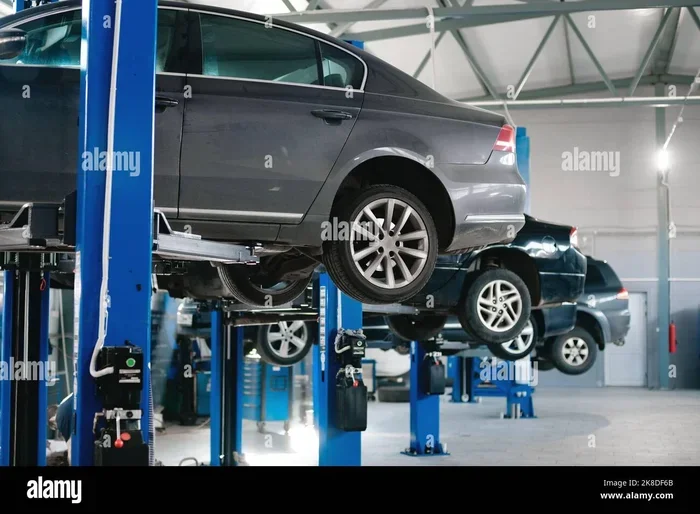
How to Raise Your Car for an Oil Change the Right Way
Raising your car the right way makes oil changes faster, safer, and much easier. This guide walks you through every step, from choosing the right jack to safely lowering your vehicle afterward. You will learn proper jack points, essential safety gear, and common mistakes to avoid.
Changing your own oil is one of the best ways to save money and keep your car running strong. But here is the thing many beginners miss. You need to raise the car properly before you can drain the old oil and swap the filter.
Learning how to raise a car for oil change is not just about lifting it off the ground. It is about doing it safely, correctly, and with confidence. A wrong move can damage your vehicle or cause a serious injury.
This guide breaks down the entire process into simple steps. Whether you use a hydraulic floor jack, car ramps, or a garage lift, you will find everything you need right here. Let us get into it.
Key Takeaways
- Always use jack stands: Never rely on a jack alone to hold your car up during an oil change.
- Know your jack points: Finding the correct lift spots prevents damage and keeps you safe.
- Gather your tools first: Having everything ready saves time and reduces frustration.
- Check your owner’s manual: Every vehicle has specific lifting instructions and weight limits.
- Work on a flat surface: A level ground prevents the car from rolling or tipping.
- Lower the car slowly: Rushing this step is one of the most common causes of injury.
📑 Table of Contents
- Why Raising Your Car Correctly Matters
- Tools and Equipment You Will Need
- Step-by-Step: How to Raise Your Car for an Oil Change
- Common Mistakes People Make When Lifting a Car
- How to Lower Your Car Safely After the Oil Change
- How Often Should You Change Your Oil?
- Quick Tips for a Smooth Oil Change Experience
- Expert Insights on Car Lifting and Oil Changes
- Conclusion
Why Raising Your Car Correctly Matters
Some people think lifting a car is simple. Just pop the jack under and go, right? Wrong. Cars are heavy, and they are not designed to be held up by a jack alone for extended work. Taking shortcuts here can lead to disasters.
When you raise a car for oil change the right way, you protect both yourself and your vehicle. A proper lift gives you clear access to the oil drain plug and oil filter. It also keeps the car stable while you work underneath it.
Think about it. You are working with hot oil, sharp tools, and a heavy vehicle all at once. That is why following the correct car lifting safety steps is so important. A few extra minutes of preparation can save you hours of trouble.
The Risks of Improper Lifting
Let us talk about what can go wrong. A jack can slip. A car can tip. Old oil can splash onto your skin. These are not scare tactics. They are real risks that happen every day in home garages.
Using the wrong jack points car location can dent the frame or undercarriage. Placing a jack on soft ground can cause it to sink and shift. And skipping oil change jack stands means you are working under a vehicle held up by nothing more than a mechanical device that can fail.
The bottom line? Take this step seriously. Your safety depends on it.
Tools and Equipment You Will Need
Before you start, make sure you have the right gear. Gathering everything ahead of time makes the whole process smoother. Here is what you need for a proper oil change jack stands setup.
Essential Lifting Tools
- Hydraulic floor jack: A 2-ton or 3-ton jack works for most sedans and SUVs. Make sure it is in good working condition.
- Jack stands: Get at least two rated for your vehicle’s weight. Heavy-duty stands are worth every penny.
- Car ramps: An alternative to jacks, especially useful for low-clearance vehicles or beginners.
- Wheel chocks: These small wedges prevent the wheels from rolling while you work.
Oil Change Tools
- Oil filter wrench: Helps you remove tight oil filters without straining your hands.
- Oil drain pan: Holds the old oil as it drains out. Get one large enough for your engine.
- Torque wrench: Ensures the drain plug and new filter are tightened to the right specs.
- Funnel: Makes pouring new oil clean and mess-free.
- Gloves and safety glasses: Protect your hands from hot oil and debris.
Choosing the Right Jack for the Job
Not all car jack types are the same. Hydraulic floor jacks are the most popular choice for home oil changes. They offer good height and stability. Scissor jacks come with most new cars but are not ideal for extended work.
If you have a low-profile sports car, consider car ramps for oil change instead. They slide under the car and lift it gradually. They are simple, stable, and very beginner-friendly.
For those with a garage lift, that is even better. Just make sure you know how to operate it safely. Read the manual and never exceed the weight capacity.
Step-by-Step: How to Raise Your Car for an Oil Change
Now for the main event. Follow these steps carefully, and you will have your car safely raised and ready for an engine oil replacement in no time.
Step 1: Park on a Flat, Level Surface
This is the most important first step. Never try to lift a car on a slope or uneven ground. Park on a concrete driveway or a flat garage floor. Turn off the engine and let the car cool down for at least 10 minutes. Hot oil can burn you, so give it time to settle.
Engage the parking brake and put the car in park (or first gear for manual transmissions). Place wheel chocks behind the rear tires. This prevents any movement while you are working.
Step 2: Locate the Correct Jack Points
Every vehicle has designated jack points on the frame or body. Check your owner’s manual to find them. These points are reinforced to handle the weight of the car. Using the wrong spot can cause damage or a dangerous slip.
For most front-wheel-drive cars, the jack point is on the front frame rail, just behind the front wheel. For rear-wheel-drive vehicles, it is often near the rear axle. Look for notches, arrows, or reinforced areas on the undercarriage.
Step 3: Lift the Car with the Jack
Position the hydraulic jack under the correct jack point. Pump the handle slowly and steadily. Lift the car until the tire is about 6 inches off the ground. You need enough clearance to slide a drain pan underneath, but not so much that the car feels unstable.
Move the jack smoothly. Do not rush. If you hear any unusual noises, stop immediately and check the position.
Step 4: Place Jack Stands Under the Frame
Here is the step you should never skip. Lower the car gently onto the oil change jack stands. Position the stands on strong frame points near the jack location. Give the car a gentle push to test stability.
If the car wobbles, lower it down and reposition the stands. Never work under a car supported only by a jack. Jacks can fail, and the results can be catastrophic.
Step 5: Double-Check Everything Before You Start
Before you crawl under the car, do a final safety check. Confirm the jack stands are on solid ground. Give each stand a firm push. Make sure the drain pan is positioned correctly under the oil drain plug.
Put on your gloves and safety glasses. You are now ready to start the oil change.
Common Mistakes People Make When Lifting a Car
Even experienced DIYers sometimes make errors when they raise a car for oil change work. Knowing these mistakes helps you avoid them.
Using the Wrong Jack Points
This is the number one mistake. Every car has specific reinforced areas designed for lifting. Placing a jack on a plastic body panel or a thin metal section can cause serious damage. Always locate the proper jack points car before you start.
Skipping Jack Stands
A jack is a lifting tool, not a support tool. It can slip or fail at any moment. Oil change jack stands are non-negotiable. They provide the stable support you need to work safely underneath the vehicle.
Working on an Uneven Surface
Even a slight slope can cause a car to shift while lifted. Always choose a flat, hard surface. Avoid gravel, dirt, or grass. Concrete or asphalt is best for car lifting safety.
Over-Tightening the Drain Plug
Once you finish draining the oil and replacing the filter, you need to reinstall the drain plug. Use a torque wrench to tighten it to the manufacturer’s specification. Over-tightening can strip the threads or crack the oil pan.
How to Lower Your Car Safely After the Oil Change
Raising the car is only half the job. Lowering it safely is just as important. Rushing this step causes more injuries than any other part of the process.
First, remove all tools and the drain pan from under the car. Make sure nothing is left behind. Then, use the hydraulic jack to lift the car slightly, just enough to remove the jack stands. Lower the jack slowly until the tires touch the ground.
Remove the jack stands completely. Give the car a gentle shake to confirm it is stable on the ground. Start the engine and let it run for a minute. Check underneath for any leaks around the drain plug and oil filter.
Turn off the engine and wait a few minutes for the new oil to settle. Then pull out the dipstick, wipe it clean, reinsert it, and check the oil level. Add more oil if needed. Dispose of the old oil properly at a recycling center.
How Often Should You Change Your Oil?
The frequency of your vehicle maintenance schedule depends on your car model, driving habits, and the type of oil you use. Most modern cars can go between 5,000 and 7,500 miles between oil changes. Some newer vehicles with synthetic oil can stretch to 10,000 miles or more.
Check your owner’s manual for the manufacturer’s recommendation. If you drive in extreme conditions, such as very hot weather, heavy traffic, or dusty roads, you may need to change your oil more often.
Keeping up with regular oil changes is one of the simplest ways to extend your engine’s life. Fresh oil lubricates the engine parts, reduces friction, and prevents overheating. It is a small investment that pays off big time.
Quick Tips for a Smooth Oil Change Experience
- Warm up the engine for 2-3 minutes before draining. Warm oil flows out faster and more completely than cold oil.
- Use an oil filter magnet to catch any small metal particles left in the engine.
- Replace the drain plug gasket every time you change the oil. This prevents leaks.
- Take photos before you start. Pictures help you remember the correct placement of parts and tools.
- Keep a cleanup kit nearby. Paper towels, a trash bag, and a small broom make post-change cleanup much easier.
- Record the oil change date and mileage. This helps you track your oil change frequency and stay on schedule.
Expert Insights on Car Lifting and Oil Changes
Professional mechanics always emphasize one thing: safety first. According to most auto experts, the key to a successful DIY oil change is preparation. Know your vehicle, use the right equipment, and never take shortcuts.
Many experienced technicians recommend using car ramps for oil change work if you are new to DIY maintenance. Ramps are simpler to use than jacks and stands, and they reduce the risk of improper placement. They are especially helpful for people with limited under-car clearance.
Another tip from the pros is to always check the oil filter wrench size before you start. A loose or ill-fitting wrench can strip the old filter and make removal much harder. Match the wrench to your specific filter model for a clean, easy fit.
Finally, do not underestimate the value of a good torque wrench. It ensures every bolt and plug is tightened to the exact specification. This small tool can prevent major engine problems down the road.
Conclusion
Learning how to raise a car for oil change is a valuable skill for every car owner. It gives you more control over your vehicle maintenance and saves you money in the long run. With the right tools, proper jack points, and a focus on safety, you can handle this job like a pro.
Remember to always use jack stands, work on a flat surface, and double-check everything before you start. These habits keep you safe and protect your car. Once you complete your first DIY oil change, you will feel confident and proud.
So grab your tools, raise your car the right way, and enjoy the satisfaction of a job well done. Your car, and your wallet, will thank you.
Frequently Asked Questions
Can I use a scissor jack to raise my car for an oil change?
Yes, but only for short-term lifting. Scissor jacks are not stable enough for extended work underneath the vehicle. Always transfer the car to jack stands before you begin draining the oil.
What is the safest way to lift a car at home?
The safest method is using a hydraulic floor jack combined with jack stands placed on a flat, hard surface. Car ramps are also a safe and simple alternative, especially for beginners.
How high should I raise the car for an oil change?
You only need enough clearance to slide a drain pan underneath and work comfortably. About 4 to 6 inches off the ground is usually sufficient for most vehicles.
What should I do if the jack starts to slip?
Stop immediately. Carefully lower the car back to the ground. Reposition the jack on the correct jack point and check that the surface is level and firm before trying again.
Do I need to warm up the engine before draining the oil?
Yes, warming up the engine for 2 to 3 minutes helps the oil flow out more smoothly and completely. This ensures you drain as much old oil as possible before adding the fresh oil.
How do I dispose of the old oil properly?
Pour the used oil into a sealed container and take it to a local auto parts store or recycling center. Never pour old oil down a drain or onto the ground. Most stores accept used oil for free recycling.