What You Need to Clean Your Car Before Ceramic Coating
Before you apply ceramic coating, your car needs a thorough and proper cleaning to ensure maximum adhesion and long-lasting protection. You will need the right wash supplies, a clay bar, iron remover, and a panel wipe solution to prep the surface correctly. Skipping any of these prep steps can lead to poor bonding, reduced durability, and a disappointing finish on your ceramic coating.
So, you have decided to ceramic coat your car. That is a great choice. Ceramic coating gives your vehicle a stunning shine and long-lasting protection. But here is the thing most people get wrong. Cleaning your car properly before ceramic coating is just as important as the coating itself. If you skip the prep, the coating will not stick. It will peel, bubble, or wear off way too fast. In this guide, we will walk you through everything you need to clean your car before applying ceramic coating. We will cover every product, every step, and every pro tip you need to know.
Think of ceramic coating like painting a wall. You would never paint over a dirty wall, right? The same rule applies to your car. Surface prep is the foundation of a successful ceramic coating job. Without it, even the best coating product will fail. This article will help you understand what supplies you need, what steps to follow, and how to avoid common mistakes. By the end, you will feel confident about prepping your car like a professional detailer.
Key Takeaways
- Proper car cleaning is essential: A dirty or contaminated surface will prevent ceramic coating from bonding correctly.
- Use the right supplies: You need a decontamination wash, clay bar, iron remover, tar remover, and panel wipe for best results.
- Paint correction matters: Fixing swirl marks and scratches before coating ensures a smooth and glossy finish.
- Follow the prep steps in order: Each step builds on the previous one for maximum coating adhesion.
- Avoid common mistakes: Using the wrong products or skipping steps can ruin your ceramic coating longevity.
- Surface prep takes time: Rushing the process leads to poor results. Plan for a full day of detailing.
- Coating durability depends on prep: A well-prepped surface can make your ceramic coating last for years.
📑 Table of Contents
- Why Cleaning Your Car Before Ceramic Coating Matters So Much
- Essential Supplies You Need to Clean Your Car Before Ceramic Coating
- The Step-by-Step Process to Clean Your Car Before Ceramic Coating
- Common Mistakes to Avoid When Cleaning Your Car Before Ceramic Coating
- Expert Tips for a Flawless Ceramic Coating Prep
- How Long Does the Cleaning Process Take?
- Key Takeaways
- Conclusion
Why Cleaning Your Car Before Ceramic Coating Matters So Much
Your car’s paint surface is exposed to many contaminants every single day. Dirt, road grime, industrial fallout, tree sap, and tar all build up on the clear coat. Even after a regular wash, invisible particles remain embedded in the paint. These contaminants create a barrier between the coating and the paint. When ceramic coating cannot bond directly to the paint, it fails to perform.
Coating adhesion depends entirely on a clean and smooth surface. A proper ceramic coating prep removes all oils, residues, and contaminants. This allows the coating to form a strong chemical bond with the paint. The result is a durable, hydrophobic, and glossy finish that lasts for years. Skipping this step means wasting your money and effort. No one wants to reapply a coating because they did not clean the car correctly the first time.
The Role of Paint Correction in Ceramic Coating Prep
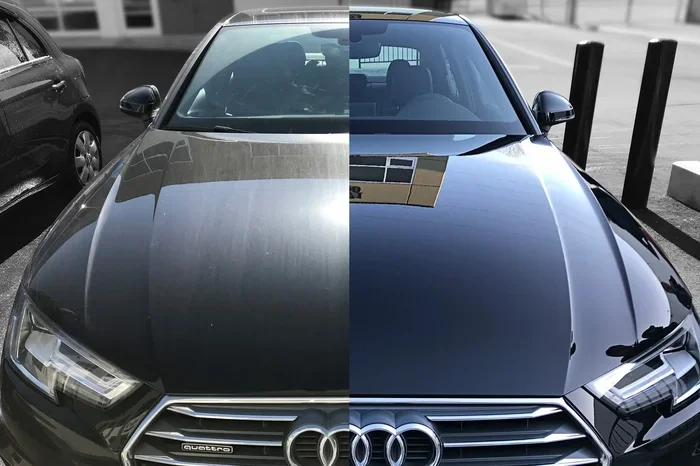
Before you even start cleaning, you need to assess the condition of your paint. Paint correction is the process of removing swirl marks, light scratches, and oxidation from the clear coat. These defects trap dirt and prevent the coating from bonding evenly. If your car has deep scratches or heavy swirl marks, you should address them first. A polished and corrected surface gives the ceramic coating a smooth canvas to work with. After paint correction, you move on to the deep cleaning phase. This is where the real car cleaning begins.
Essential Supplies You Need to Clean Your Car Before Ceramic Coating
Having the right supplies makes all the difference. You cannot just use any soap and call it a day. Ceramic coating requires a level of cleanliness that goes far beyond a regular car wash. Here is a full list of what you need.
1. A Quality Car Wash Soap
Start with a pH-neutral wash soap designed for car cleaning. Avoid dish soap or household cleaners. These strip away natural oils and leave residue behind. A good wash soap lifts dirt and grime without damaging the clear coat. Use a soft washing mitt made of microfiber or lambswool. These materials are gentle on the paint and prevent new swirl marks.
2. Two-Bucket Method Supplies
The two-bucket method is the gold standard for decontamination wash. You need two buckets. One holds soapy water for washing. The other holds clean rinse water with a grit guard at the bottom. The grit trap catches dirt and debris from your mitt so you never drag abrasive particles across the paint. This simple technique dramatically reduces the risk of scratching your car during the wash.
3. Iron Remover
Iron fallout is one of the biggest enemies of a clean paint surface. Brake dust, rail dust, and industrial particles embed themselves into the clear coat. A spray-on iron remover reacts with these particles and dissolves them safely. You spray it on, let it sit for a few minutes, and then rinse it off. The product turns purple or red as it lifts iron contamination from the paint. This step is critical for surface prep before ceramic coating.
4. Tar Remover
Bug splatter and road tar are stubborn contaminants that regular washing cannot remove. A dedicated tar remover dissolves these sticky substances without harming the paint. Apply it to affected areas, let it dwell briefly, and then wipe it away. Pay special attention to the front bumper, hood, and lower panels where tar buildup is most common.
5. Clay Bar or Clay Mitt
After the wash and iron removal, your paint may still feel rough to the touch. Embedded contaminants that are not soluble need to be removed mechanically. This is where a clay bar comes in. You use it with a lubricant spray to gently glide over the paint surface. The clay picks up embedded particles, leaving the paint perfectly smooth. A clay mitt works the same way and is easier to use for larger areas. Smooth paint is essential for coating adhesion.
6. Microfiber Towels
You will need plenty of clean microfiber towels throughout the process. These towels are lint-free and gentle on the paint. Use different towels for different stages of the cleaning process. Label them or keep them color-coded so you never cross-contaminate surfaces. A good set of microfiber towels is one of the most important investments for any detailer.
7. Isopropyl Alcohol (IPA) Solution
An IPA solution is used in the final stage of surface prep. It removes oils, silicones, and any remaining residues that could block coating bonding. A common ratio is 15-20% IPA mixed with 80-85% distilled water. This solution wipes down each panel just before coating application. It ensures the paint is completely free of contaminants and ready for the ceramic coat.
8. Panel Wipe Solution
A panel wipe is a specialized cleaning solution designed for the final wipe-down before ceramic coating. It removes fingerprint oils, dust, and any leftover residue. Many detailers use panel wipes as the last step before applying the coating. They are fast, effective, and leave behind a perfectly clean surface. Some panel wipes contain isopropyl alcohol for extra degreasing power.
9. Detail Spray or Quick Detailer
A detail spray is useful for quick wipe-downs between steps. It adds a thin layer of lubrication and helps remove light dust. While it is not a substitute for the full cleaning process, it is a handy tool to have in your detailing kit.
The Step-by-Step Process to Clean Your Car Before Ceramic Coating
Now that you have all the supplies, let us walk through the actual process. Follow these steps in order for the best results.
Step 1: Perform a Thorough Decontamination Wash
Start by washing your car using the two-bucket method. Use your pH-neutral soap and a soft washing mitt. Work from the top down. The lower panels are the dirtiest, so save them for last. Rinse each section thoroughly before washing to remove loose dirt. After the full wash, rinse the entire car and dry it with a clean microfiber towel or an air blower.
Step 2: Apply Iron Remover
Spray the iron remover onto the paint panels one at a time. Let it sit for the recommended time on the product label. You will see it change color as it reacts with iron particles. Rinse it off completely before moving to the next panel. Make sure to cover the wheels and lower trim areas where brake dust accumulates most.
Step 3: Use Tar Remover on Sticky Contaminants
Spray tar remover on areas with bug splatter, sap, or road tar. Allow it to break down the sticky substances. Wipe them away gently with a microfiber towel. Repeat if needed for stubborn spots. This step ensures that no residue remains on the paint surface.
Step 4: Clay the Paint Surface
Spray your clay lubricant on a small section of the car. Glide the clay bar or clay mitt over the lubricated area with light pressure. The clay will pick up any remaining embedded contaminants. Fold the clay frequently to expose a clean surface. After claying, wipe the area with a fresh microfiber towel to remove any lubricant residue.
Step 5: Polish and Correct the Paint (If Needed)
If your paint has swirl marks or light scratches, now is the time to correct them. Use a polishing pad and compound with a dual-action polisher. Work in small sections and wipe away residue with a clean microfiber towel. Paint correction is not always necessary, but it significantly improves the final look of your ceramic coating.
Step 6: Wipe Down with IPA Solution
Mix your IPA solution at the recommended ratio. Spray it onto a microfiber towel and wipe down each panel. This removes any remaining oils and prepares the surface for coating. Work one panel at a time and do not let the IPA solution dry on the paint.
Step 7: Final Panel Wipe
Use a panel wipe for the final clean before coating application. Spray it lightly on each panel and wipe with a fresh microfiber towel. This ensures zero contamination on the paint surface. Your car is now fully prepped and ready for ceramic coating.
Common Mistakes to Avoid When Cleaning Your Car Before Ceramic Coating
Even experienced detailers can make mistakes during the prep process. Here are the most common errors to avoid.
- Skipping the clay bar step: Many people think a good wash is enough. But embedded contaminants remain in the paint and block coating adhesion. Always clay your car.
- Using the wrong soap: Dish soap and harsh cleaners strip the paint and leave residues. Always use a pH-neutral car wash soap.
- Not drying the car properly: Water spots contain minerals that interfere with coating bonding. Dry the car thoroughly with a clean microfiber towel or a blower.
- Applying coating in direct sunlight: The heat causes the coating to flash cure too quickly. This prevents proper bonding and creates a rough texture.
- Touching the paint after prep: Finger oils and dust contaminate the surface. Handle the car as little as possible after the final wipe-down.
- Rushing the process: Surface prep takes time. Rushing leads to missed contaminants and poor coating performance. Take your time and do it right.
Expert Tips for a Flawless Ceramic Coating Prep
Professional detailers follow a few extra tips that make a huge difference in the final result. Here is what the experts recommend.
- Work in a controlled environment: A garage or covered area protects your car from dust and wind during the prep process.
- Use distilled water for mixing: Tap water contains minerals that can leave spots and residues on the paint.
- Check the paint under a LED light: Inspecting the paint under bright light reveals swirl marks, scratches, and contamination you might otherwise miss.
- Do not skip paint correction: Even if the paint looks fine, a light polish can remove hidden defects and improve coating gloss.
- Work in small sections: Prepping one panel at a time keeps you focused and ensures no area is missed.
- Keep your workspace dust-free: Blow off dust from the car with compressed air before the final IPA wipe-down.
How Long Does the Cleaning Process Take?
The full cleaning process typically takes anywhere from 4 to 8 hours depending on the condition of your car. A lightly contaminated vehicle in good shape may only need 4 hours. A car with heavy fallout, tar, and swirl marks could take a full day. Do not rush this process. The time you invest in proper cleaning directly affects how long your ceramic coating lasts. A well-prepped surface can help your coating durability extend to 3-5 years or more.
Some detailers split the prep into two days. They do the wash, iron removal, and claying on the first day. Then they handle paint correction, IPA wipe-down, and panel wiping on the second day. This approach keeps you fresh and ensures each step gets the attention it deserves. Find a schedule that works for you and stick to it.
Key Takeaways
- Proper car cleaning is essential: A dirty or contaminated surface will prevent ceramic coating from bonding correctly.
- Use the right supplies: You need a decontamination wash, clay bar, iron remover, tar remover, and panel wipe for best results.
- Paint correction matters: Fixing swirl marks and scratches before coating ensures a smooth and glossy finish.
- Follow the prep steps in order: Each step builds on the previous one for maximum coating adhesion.
- Avoid common mistakes: Using the wrong products or skipping steps can ruin your ceramic coating longevity.
- Surface prep takes time: Rushing the process leads to poor results. Plan for a full day of detailing.
- Coating durability depends on prep: A well-prepped surface can make your ceramic coating last for years.
Conclusion
Cleaning your car before ceramic coating is the most important step in the entire process. No ceramic product can perform well on a poorly prepped surface. You need the right supplies, the right technique, and the right mindset. Follow the steps we outlined in this guide, and your car will be perfectly prepped for a long-lasting ceramic coating. Remember to take your time, avoid common mistakes, and invest in quality products. The effort you put into surface prep today will pay off with years of stunning protection and gloss. Now go get your car cleaned and get ready to apply that ceramic coating with confidence!
FAQs
Can I use a regular car wash instead of a pH-neutral soap for ceramic coating prep?
No, regular car washes often contain harsh chemicals and surfactants that leave residues on the paint. These residues block coating adhesion and reduce durability. Always use a pH-neutral wash soap designed for car cleaning before ceramic coating.
Do I need to clay my car if it already feels smooth after washing?
Yes, you should still clay your car. Washing removes surface dirt, but embedded contaminants like industrial fallout and micro particles remain in the clear coat. A clay bar or clay mitt removes these hidden particles and ensures the paint is perfectly smooth for coating.
What happens if I apply ceramic coating without proper surface prep?
Without proper surface prep, the ceramic coating will not bond correctly. It may peel, flake, or wear off within weeks. The coating will also lose its hydrophobic properties and glossy appearance much faster than expected. Proper prep is non-negotiable for coating adhesion and durability.
Can I use isopropyl alcohol directly on my car paint during prep?
You should not use pure isopropyl alcohol directly on the paint. It can strip away protective layers and cause damage. Always dilute it with distilled water at a ratio of 15-20% IPA to 80-85% water. This IPA solution safely removes oils and residues without harming the paint.
How long should I wait after cleaning my car to apply ceramic coating?
You should apply the ceramic coating as soon as possible after the final panel wipe. The longer you wait, the more dust and oils can settle on the clean surface. Ideally, apply the coating within a few hours of completing your ceramic coating prep steps.
Is paint correction necessary before ceramic coating?
Paint correction is not always mandatory, but it is highly recommended. It removes swirl marks, light scratches, and oxidation that can affect the final appearance of the coating. A corrected surface allows the ceramic coating to bond more evenly and look its absolute best.